The Project Connections page - titled Connections in the app - shows how the devices in your ETS project talk to each other through group addresses. It is not the same as the Connect page, where you connect to a gateway: this page works entirely from your project. Pick a device to see which devices it controls and which control it, or pick a group address to see who sends on it and who listens. It answers in seconds what usually takes a laptop and ETS: what is this push button actually wired to?
The page works from your loaded ETS project, so it needs no gateway connection - you can use it anywhere, even before you arrive on site.
Opening the page
- ⋯ Actions → Connections - available once an ETS project is loaded.
- A device's sheet on the Project page (Devices, Topology, or Buildings tab) - opens the page for that device.
- A group address's sheet on the Project page - tap Connections to open the page for that group address.
Searching
At the top of the page, choose what you want to look up:
| Mode | Enter | Shows |
|---|---|---|
| Device | An individual address, e.g. 1.1.5, or part of a device name |
The devices this device is linked to |
| Group address | A group address, e.g. 1/2/3, or part of its name |
Every device on that group address and its role |
Tap Show, or the arrow in the search field, to see the result. The icon at the left of the search field opens Browse, a list to pick from; Clear results at the top right starts over. Addresses must match exactly - 1.1.1 never finds 1.1.10 - while names can match partly. If more than one device or group address matches a name, SharKNX lets you Browse the matches and pick one.
Device mode: who is this device linked to?
The result groups every linked device by direction:
| Section | Means |
|---|---|
| Send to | Devices this device sends to - for a push button, the actuators it switches |
| Receive from | Devices this device listens to - for an actuator, the push buttons and sensors that control it |
| Bidirectional | Devices it both sends to and receives from on the same group addresses |
Each linked device shows its name, individual address, and how many group addresses connect the two.
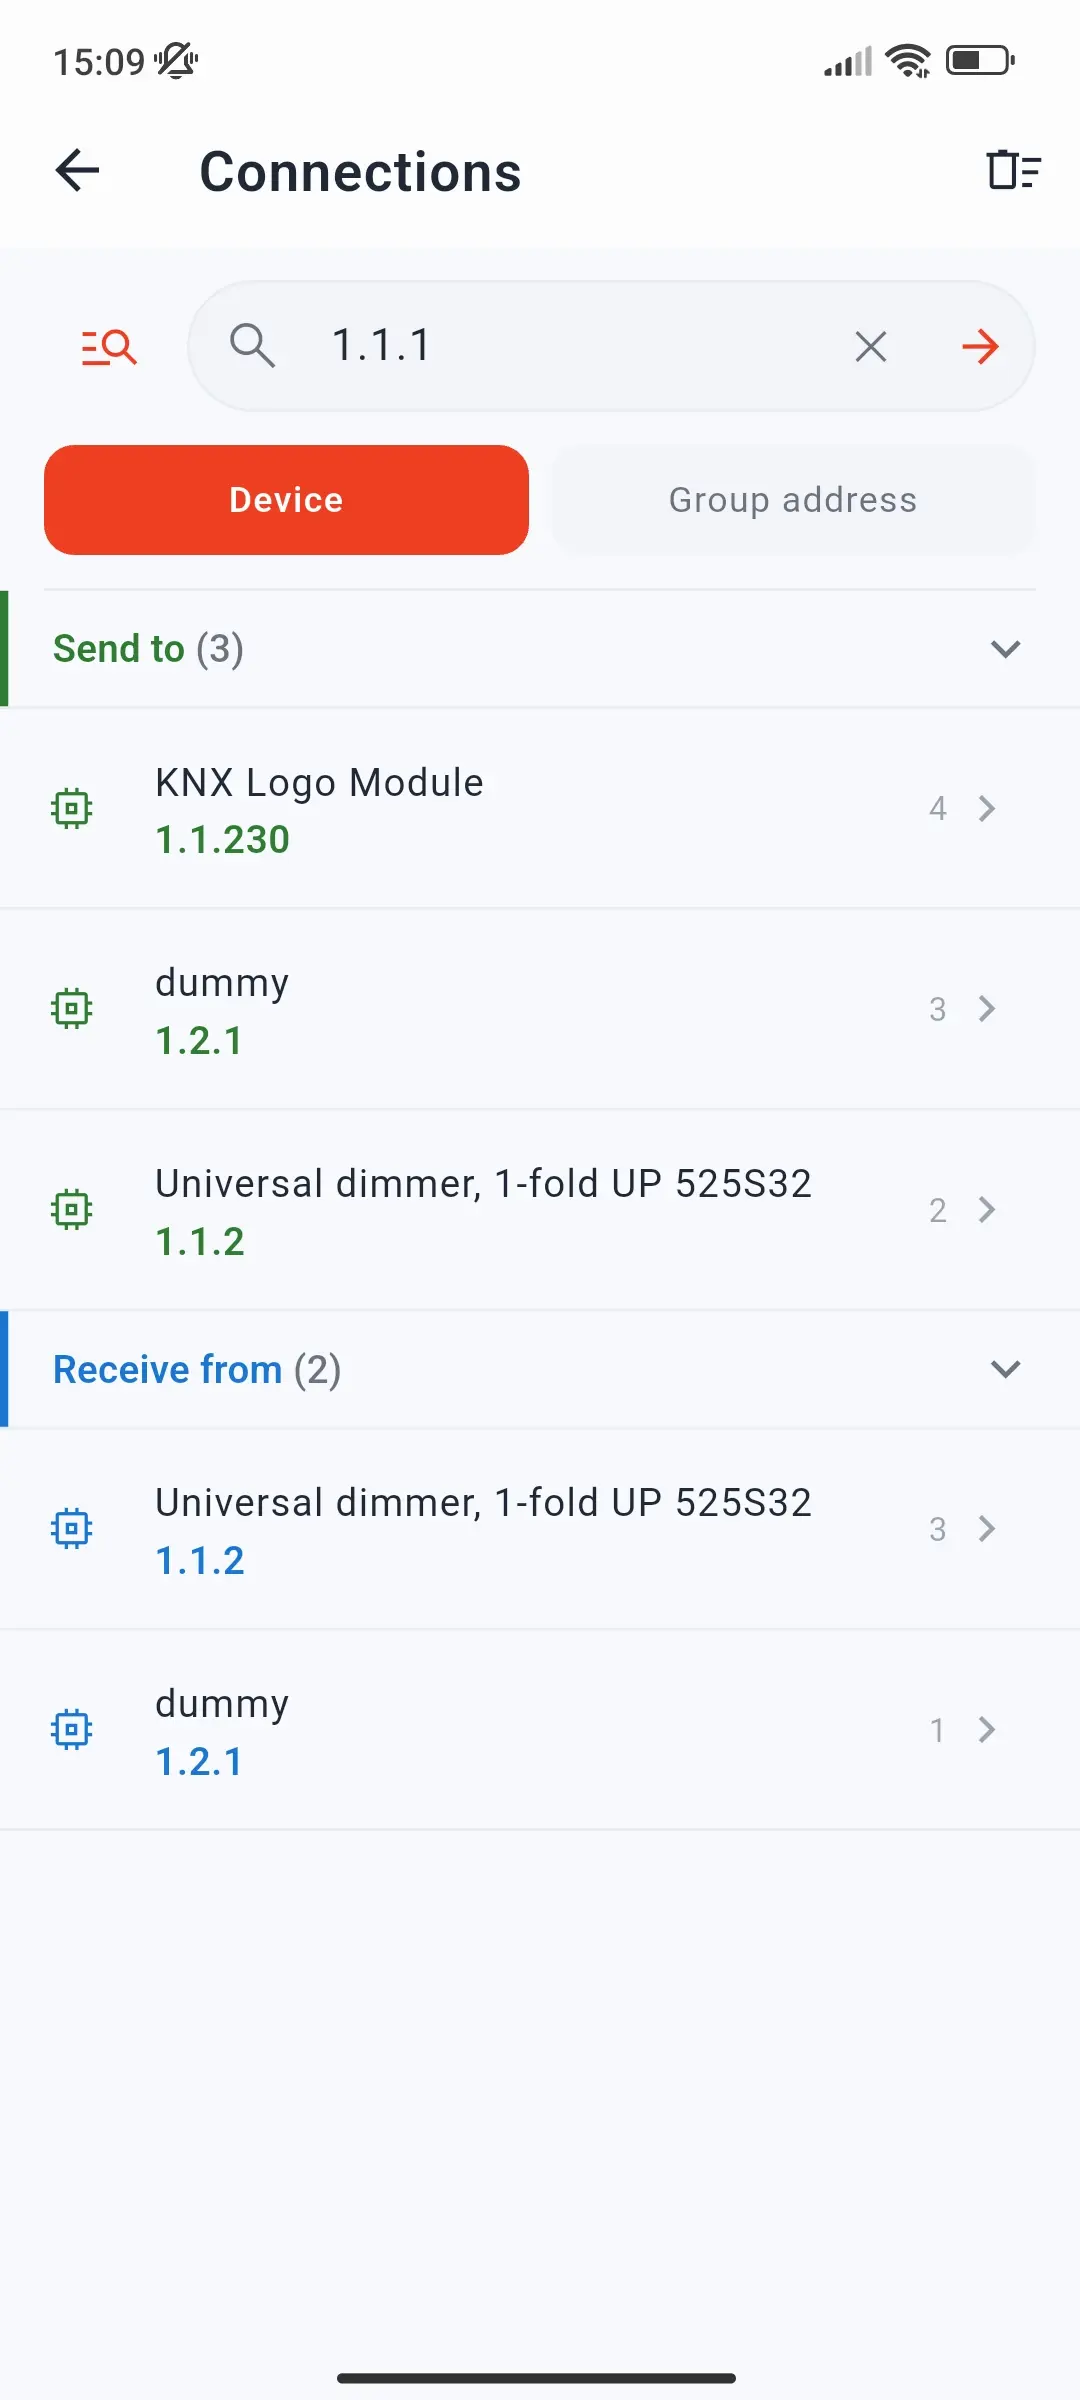
Following a connection path
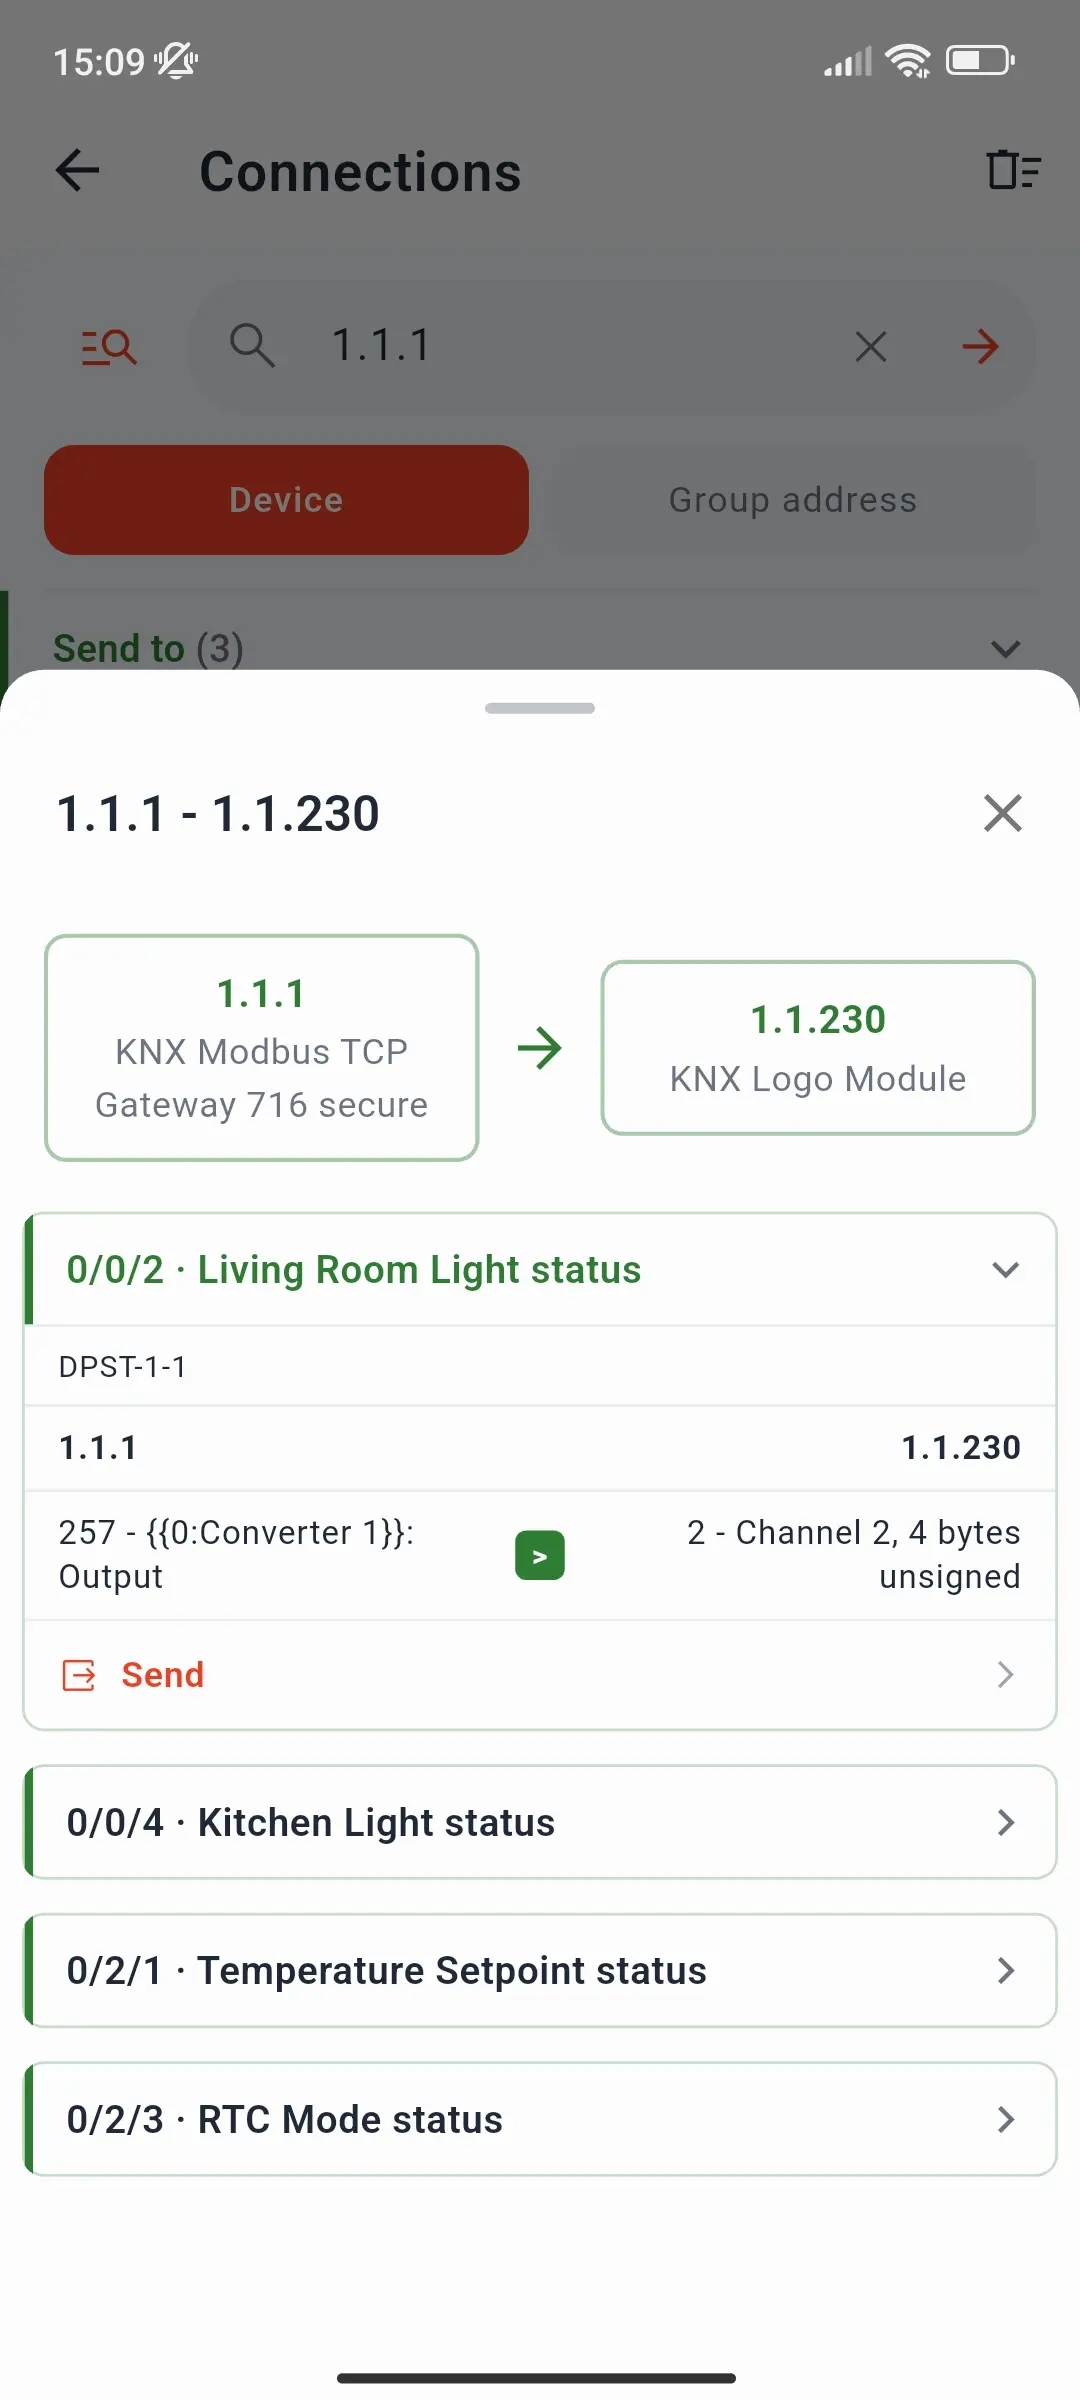
Tap a linked device to see exactly how the two are connected. The sheet shows both devices and lists every group address they share. Expand one to see its datapoint type and the communication object on each side - the path a telegram takes, for example from object 257 on 1.1.1 through 0/0/2 to object 2 on 1.1.230. A Send row lets you write to or read that group address straight away.
Group address mode: who is on this group address?
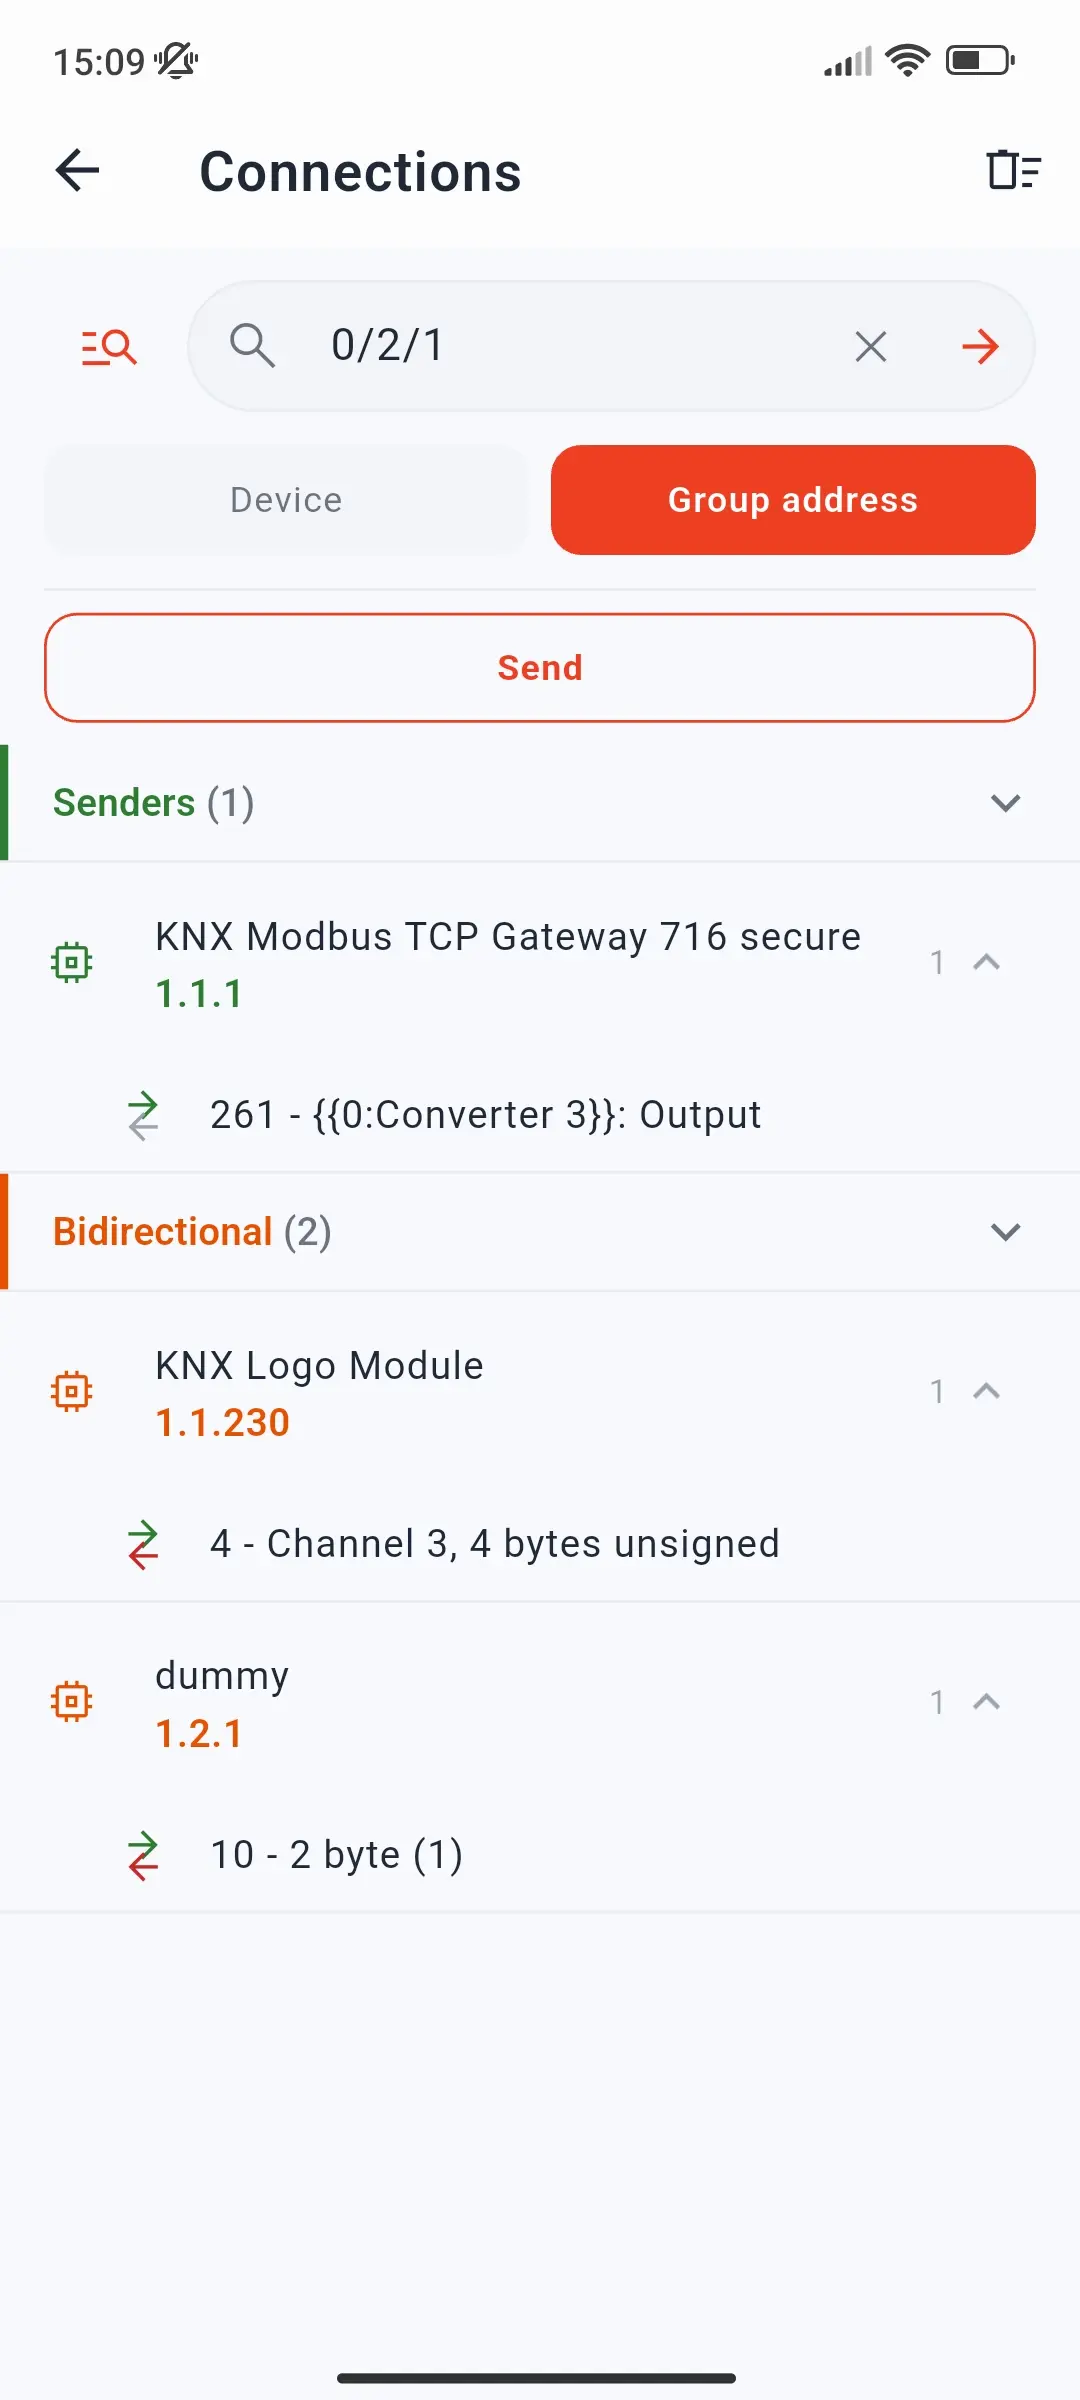
The result lists every device linked to the group address, grouped by role:
| Section | Means |
|---|---|
| Senders | Devices that transmit on it - push buttons, sensors, logic |
| Receivers | Devices that react to it - actuators, displays |
| Bidirectional | Devices that both send and receive, such as actuators reporting their state |
| Unknown | Devices whose direction the project doesn't make clear |
Expand a device to see which of its communication objects are linked to the group address. The Send button above the result lets you write to or read the group address directly - no need to find it on the Project page first.
How SharKNX works out the roles
Roles come from the communication object flags in your ETS project. An object with the transmit (T) or read-on-init (I) flag is a sender; one with the write (W) flag is a receiver; one with both T and W is bidirectional. An object that only answers reads (R) counts as a sender, since it puts values on the bus. The page shows what ETS says should happen - to check what a physical device is actually programmed with, read it with Tools → Inspect.
If a device or group address has no connections, SharKNX tells you: the device may have no communication objects assigned, or the group address may not be linked to any object in ETS.
What it's useful for
- Troubleshooting - a light doesn't switch? Look up the push button, follow the path to the actuator, and check the group address in between. Then send to it from the same page.
- Before changing something - look up a group address to see every device that will react if you write to it.
- Understanding a project you didn't create - start from any device and follow its links through the installation.
- Commissioning checks - confirm that every push button reaches the actuators it should, before you walk the building.
- Planning a test - find all receivers of a group address, then build a Shark Hunt that switches it and monitors their responses.
With no ETS project, you can still see a single device's links by reading its memory on Tools → Inspect - see Inspect a Device.
Related
- ETS Projects in SharKNX - everything a loaded project unlocks
- Project Page - browse and filter the whole installation
- Send Commands - all the ways to send