What you need
A supported device:
| Platform | Minimum version | Store |
|---|---|---|
| Android | Android 7.0 | Google Play |
| iPhone and iPad | iOS / iPadOS 15 | App Store |
| Mac | macOS 13 Ventura | App Store |
| Windows | Windows 10 | Microsoft Store |
You also need:
- A KNX IP interface or router reachable on the same network as your device. USB interfaces are not supported.
- (Recommended) Your ETS project file (
.knxproj), so telegrams show names and decoded values instead of raw addresses and hex.
Plans: On Android, iOS, and macOS, SharKNX is free to download with a free plan - project browsing, bus connection, live monitoring of the last 20 telegrams, and 3 commands per day - so you can follow this whole guide without paying. Subscriptions (with a 14-day free trial) and a lifetime option unlock everything. On Windows, SharKNX is a one-time purchase with every feature included. See Subscription Plans.
First launch: on Android, iOS, and macOS, the app needs an internet connection once to verify your plan before it can load a project or connect to the bus. After that, KNX work runs entirely on your local network.
Step 1 - Connect to Your Gateway
The Connect page opens when the app starts. It is the first tab in the bottom navigation bar.
Tap the scan button at the bottom of the page.
The app searches your network for KNX IP interfaces and routers. Each one that responds appears as a card on the Discover tab.Tap Select on the gateway card you want to use.
The app selects the gateway and opens a connection to it. The gateway also appears under Last used gateway at the top of the page and is remembered across restarts - next time, just tap it to reselect it without scanning again.
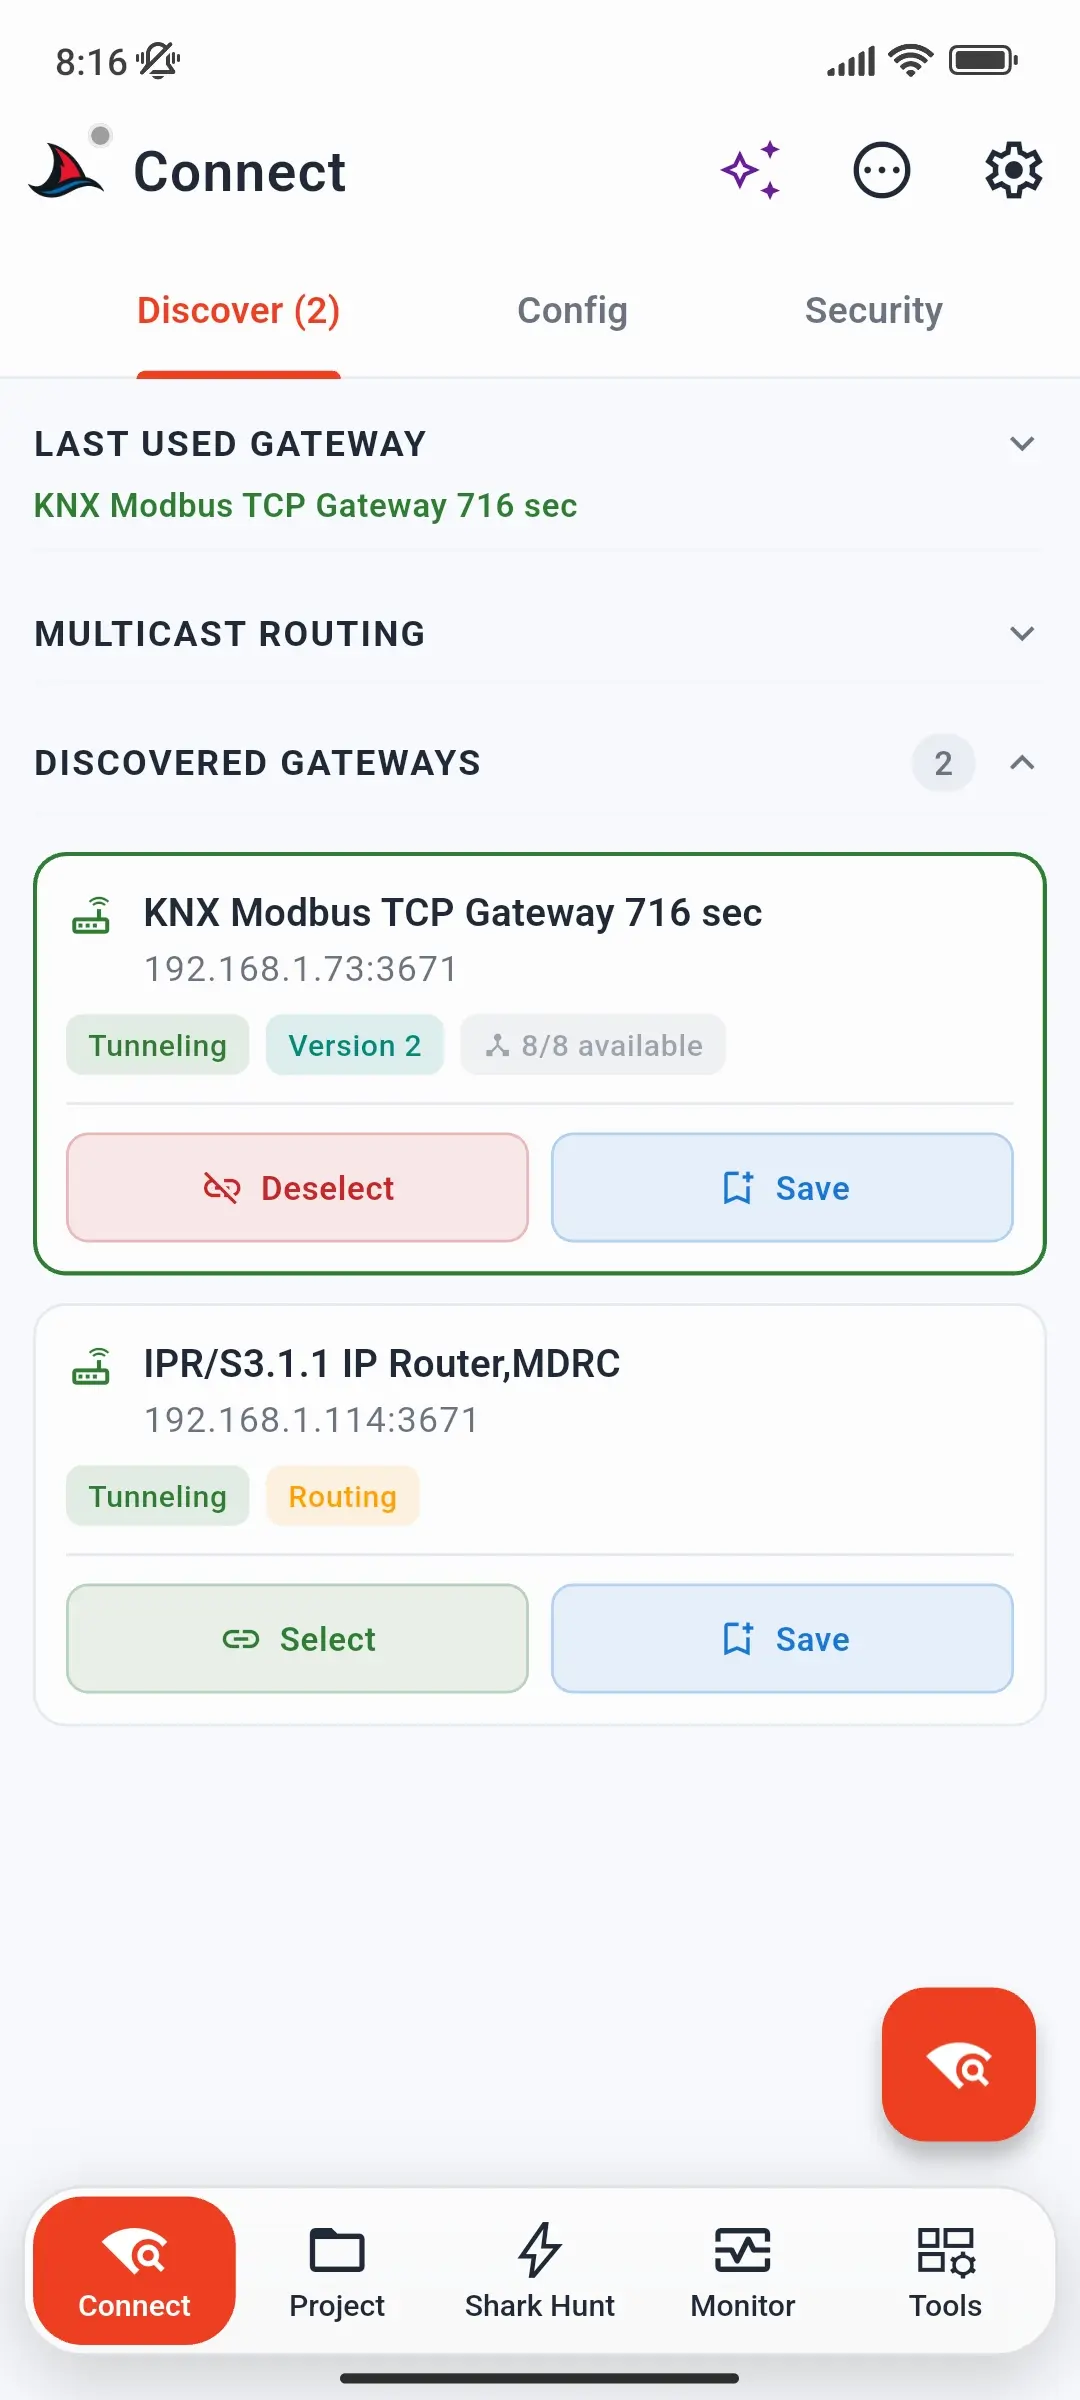
No gateways found? Make sure your device is on the same network as the gateway. Some Wi-Fi routers drop the multicast packets used for discovery - add the gateway manually by IP address on the Config tab, or enable Force Unicast Subnet Scan in Discover Settings.
KNX IP Secure? Secure gateways need credentials from your
.knxkeyskeyring or.knxprojfile. Load them on the Security tab - if they are missing, the app offers to take you there when you tap Select. See Set Up KNX IP Secure for the full procedure.
Save for later: Tap Save on a gateway card to keep it on the Config tab, ready for your next visit to the same installation.
Step 2 - Load Your ETS Project
An ETS project gives SharKNX the group address names, datapoint types, and device details for your installation.
- Tap the Project page (second tab in the bottom navigation bar). It opens on the project dashboard.
- Under Quick access, tap Load project and pick your
.knxprojfile. Password-protected projects are supported - the app asks for the password. - When loading finishes, the project opens in four tabs: Addresses, Devices, Topology, and Buildings.
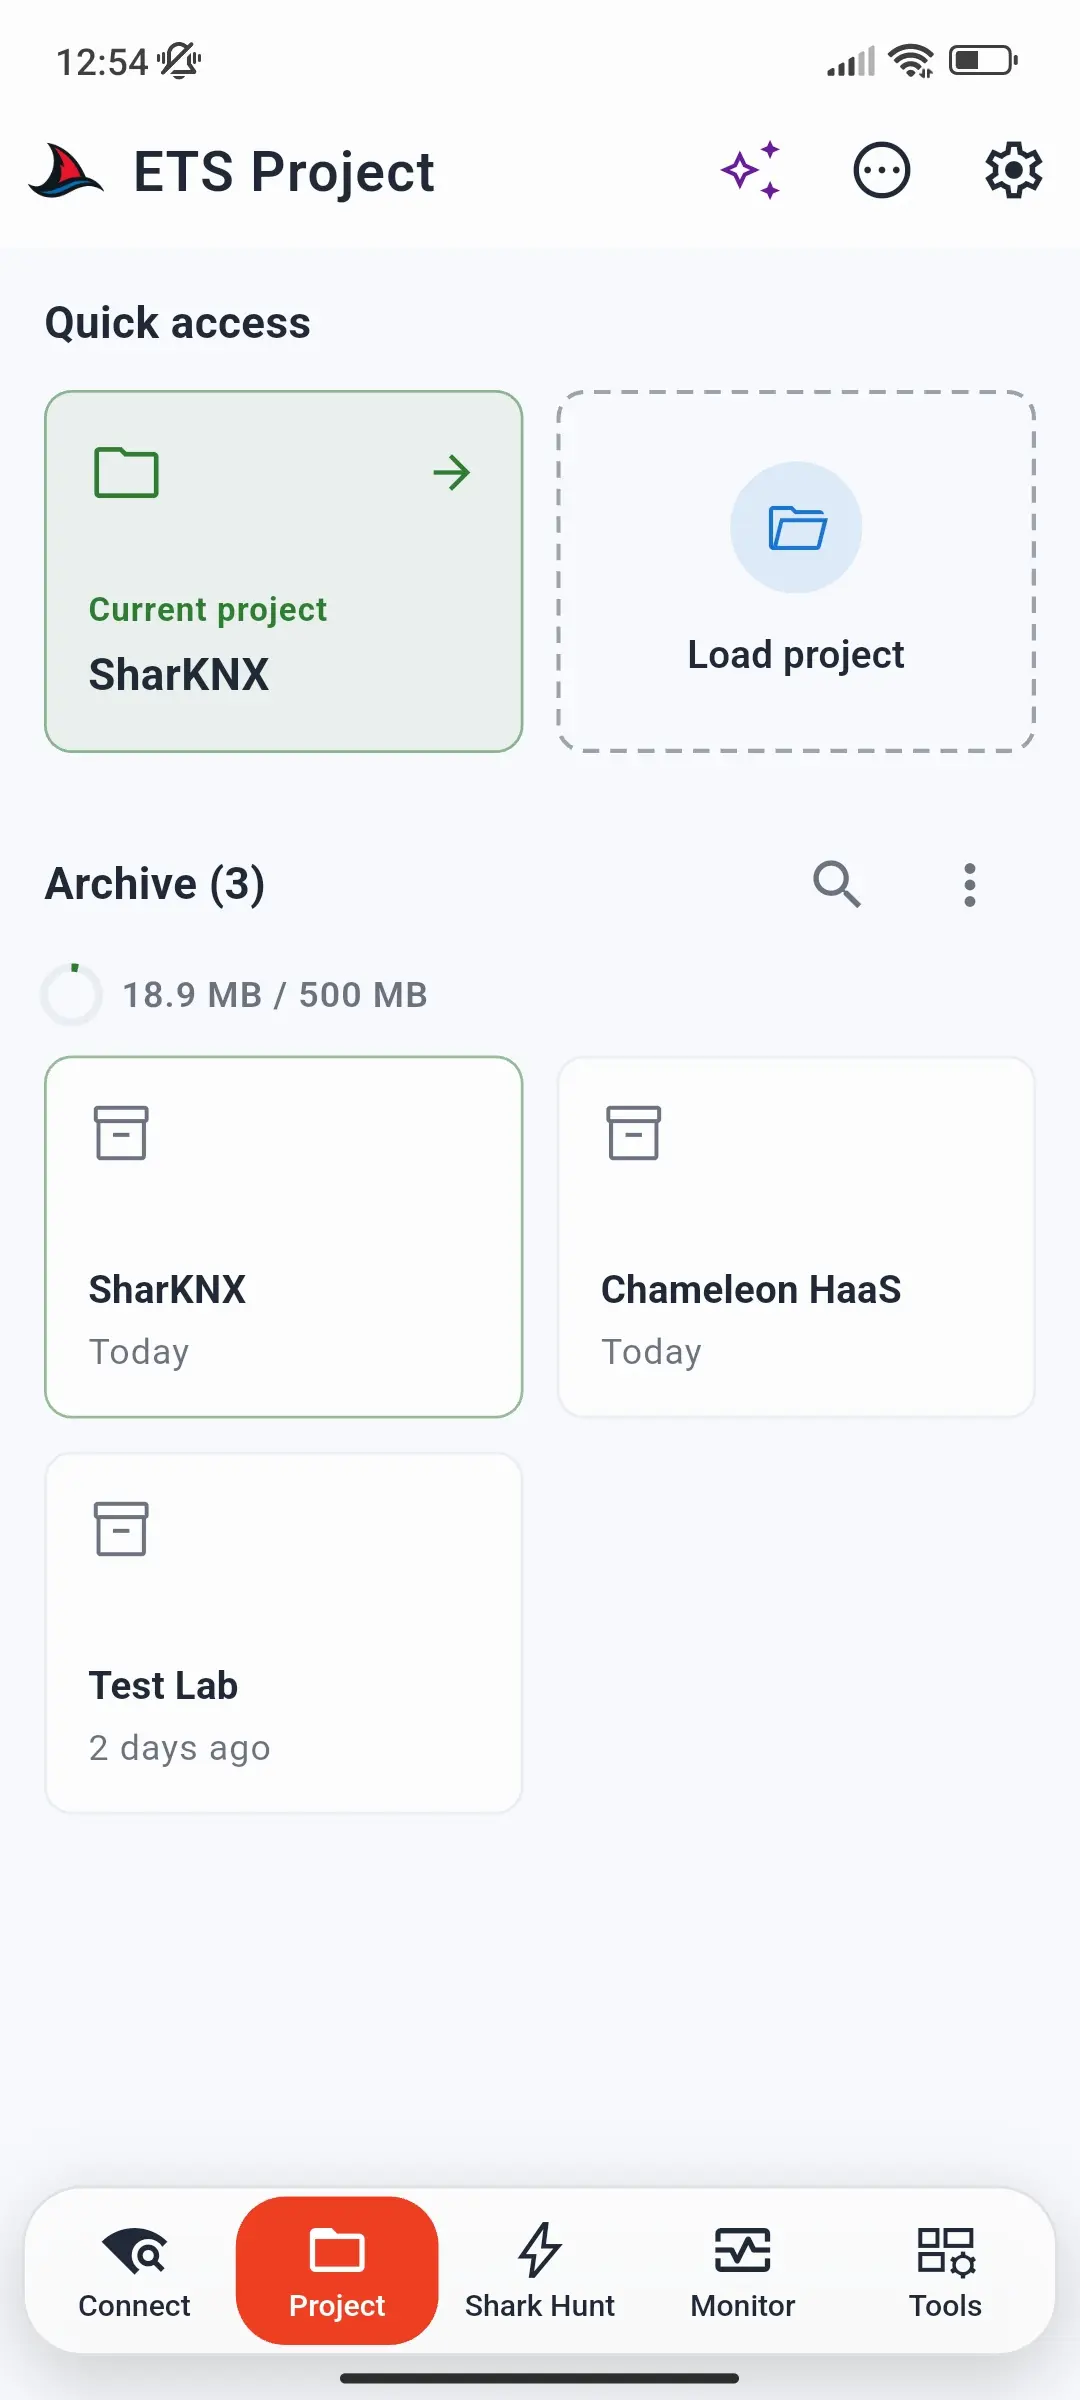
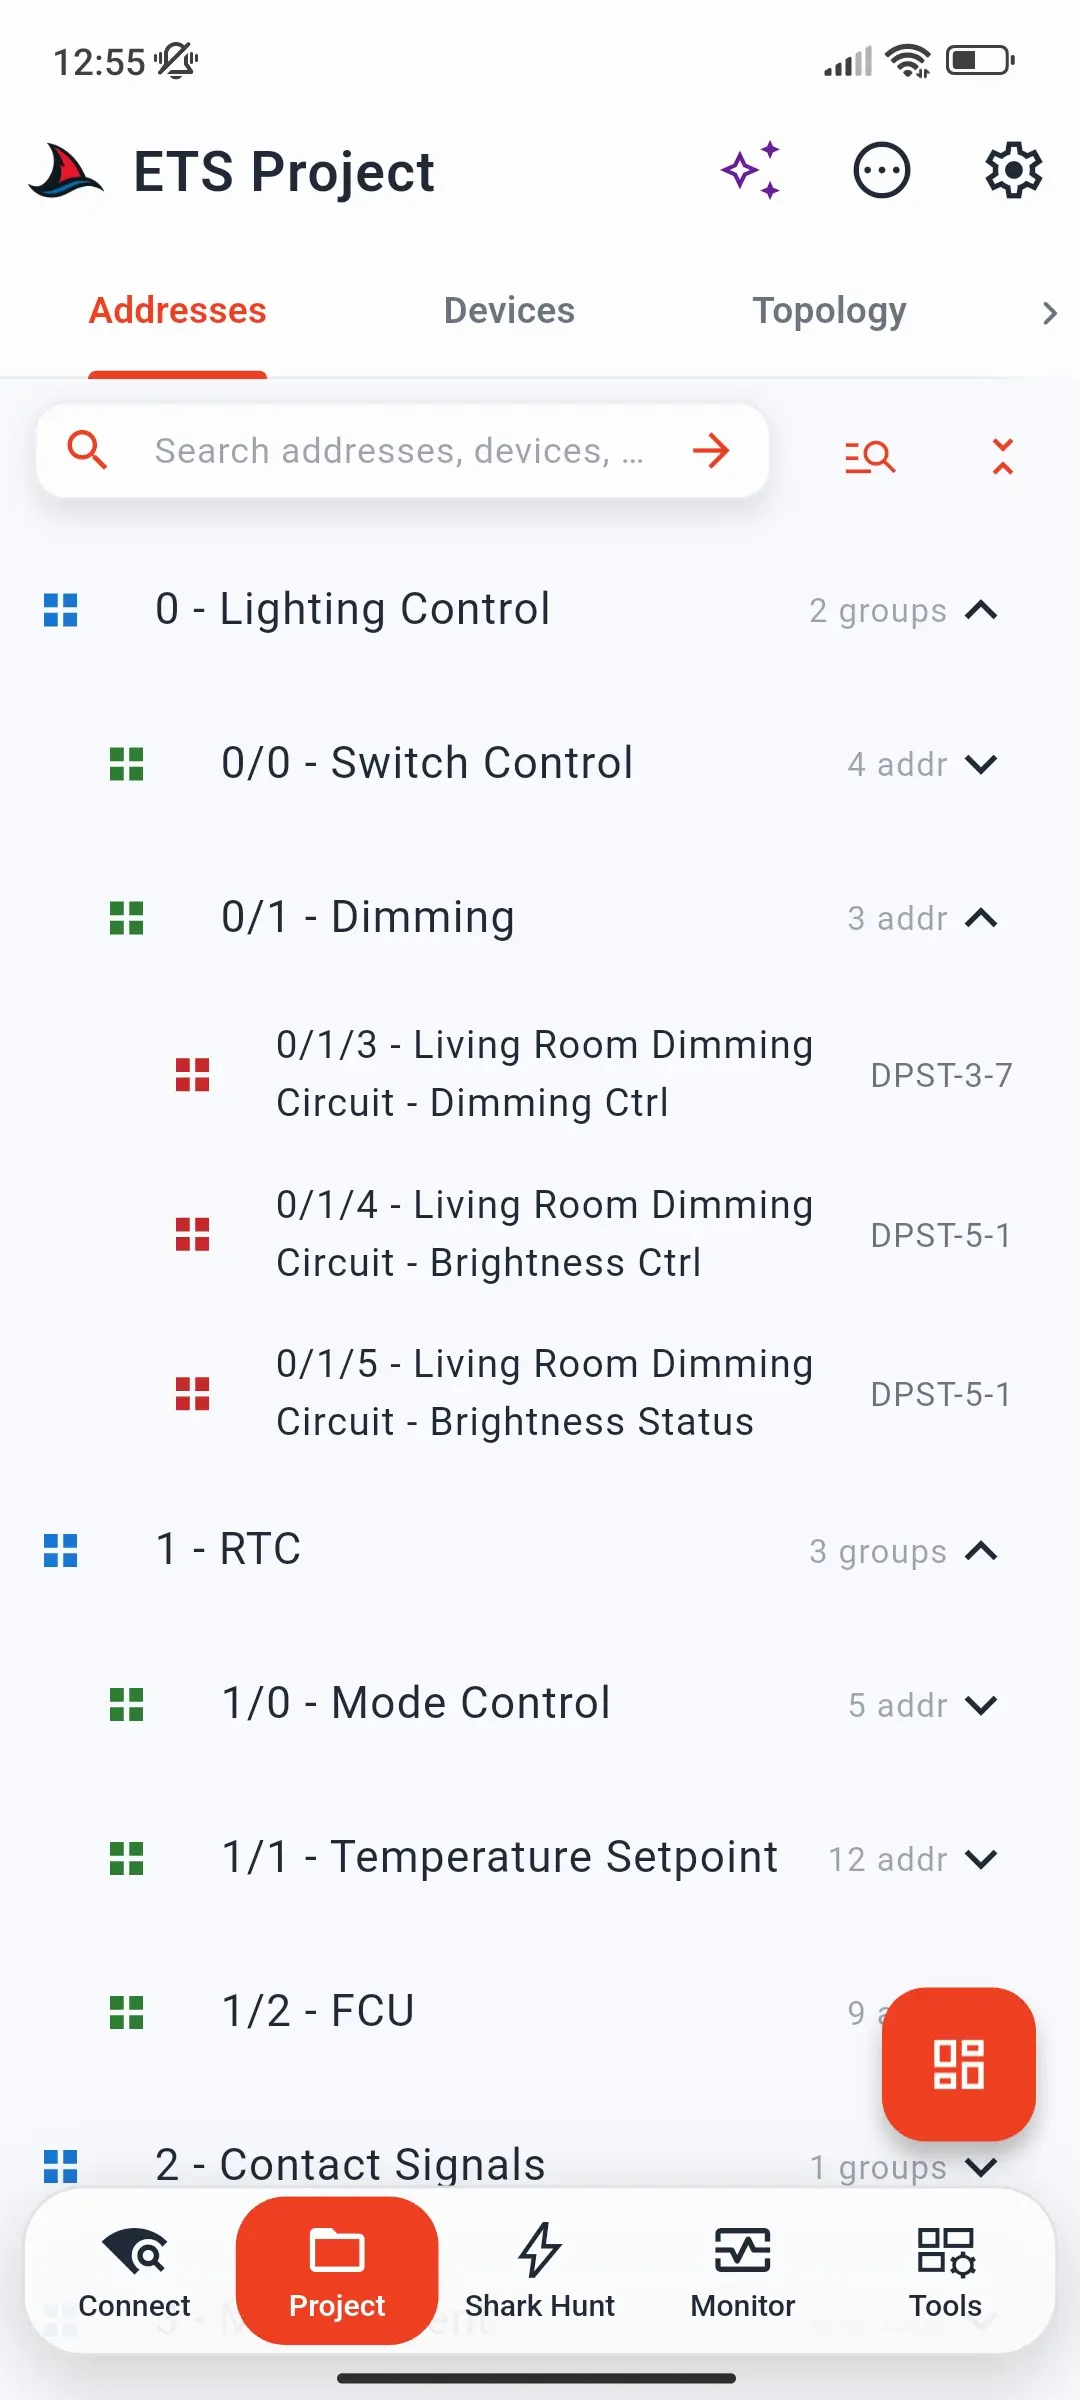
The Archive: every project you load is also kept in the Archive on the project dashboard, so you can reopen it with one tap later - even if the original file is gone from your device. While a project is open, the dashboard button at the bottom right takes you back to the dashboard.
Getting the file onto your device: Export your project from ETS on your PC, then move the
.knxprojfile to your phone or tablet any way you like - send it to yourself in a messaging app (e.g. your own chat in Viber, WhatsApp, or Telegram), email it, put it in a cloud drive (Google Drive, iCloud, OneDrive), or copy it over USB.
No project? You can skip this step. The monitor still works; telegrams just show raw addresses and hex values.
Step 3 - Start the Bus Monitor
- Tap the Monitor page (fourth tab in the bottom navigation bar).
- Tap the green start button.
If you have not connected to a gateway yet, a picker lists your discovered and saved gateways - choose one to continue.
The mode badge at the top of the page shows which mode the session uses. Group Monitor shows group traffic and lets you send commands; Bus Monitor captures every frame on the line, including acknowledgements, but is receive-only. To switch, tap the badge and pick a mode - the session starts in that mode straight away. - Telegrams appear in the list as they arrive. Each row shows:
- Sender individual address → destination group address
- Group address name and decoded value (with an ETS project loaded)
- Raw hex payload
- Timestamp
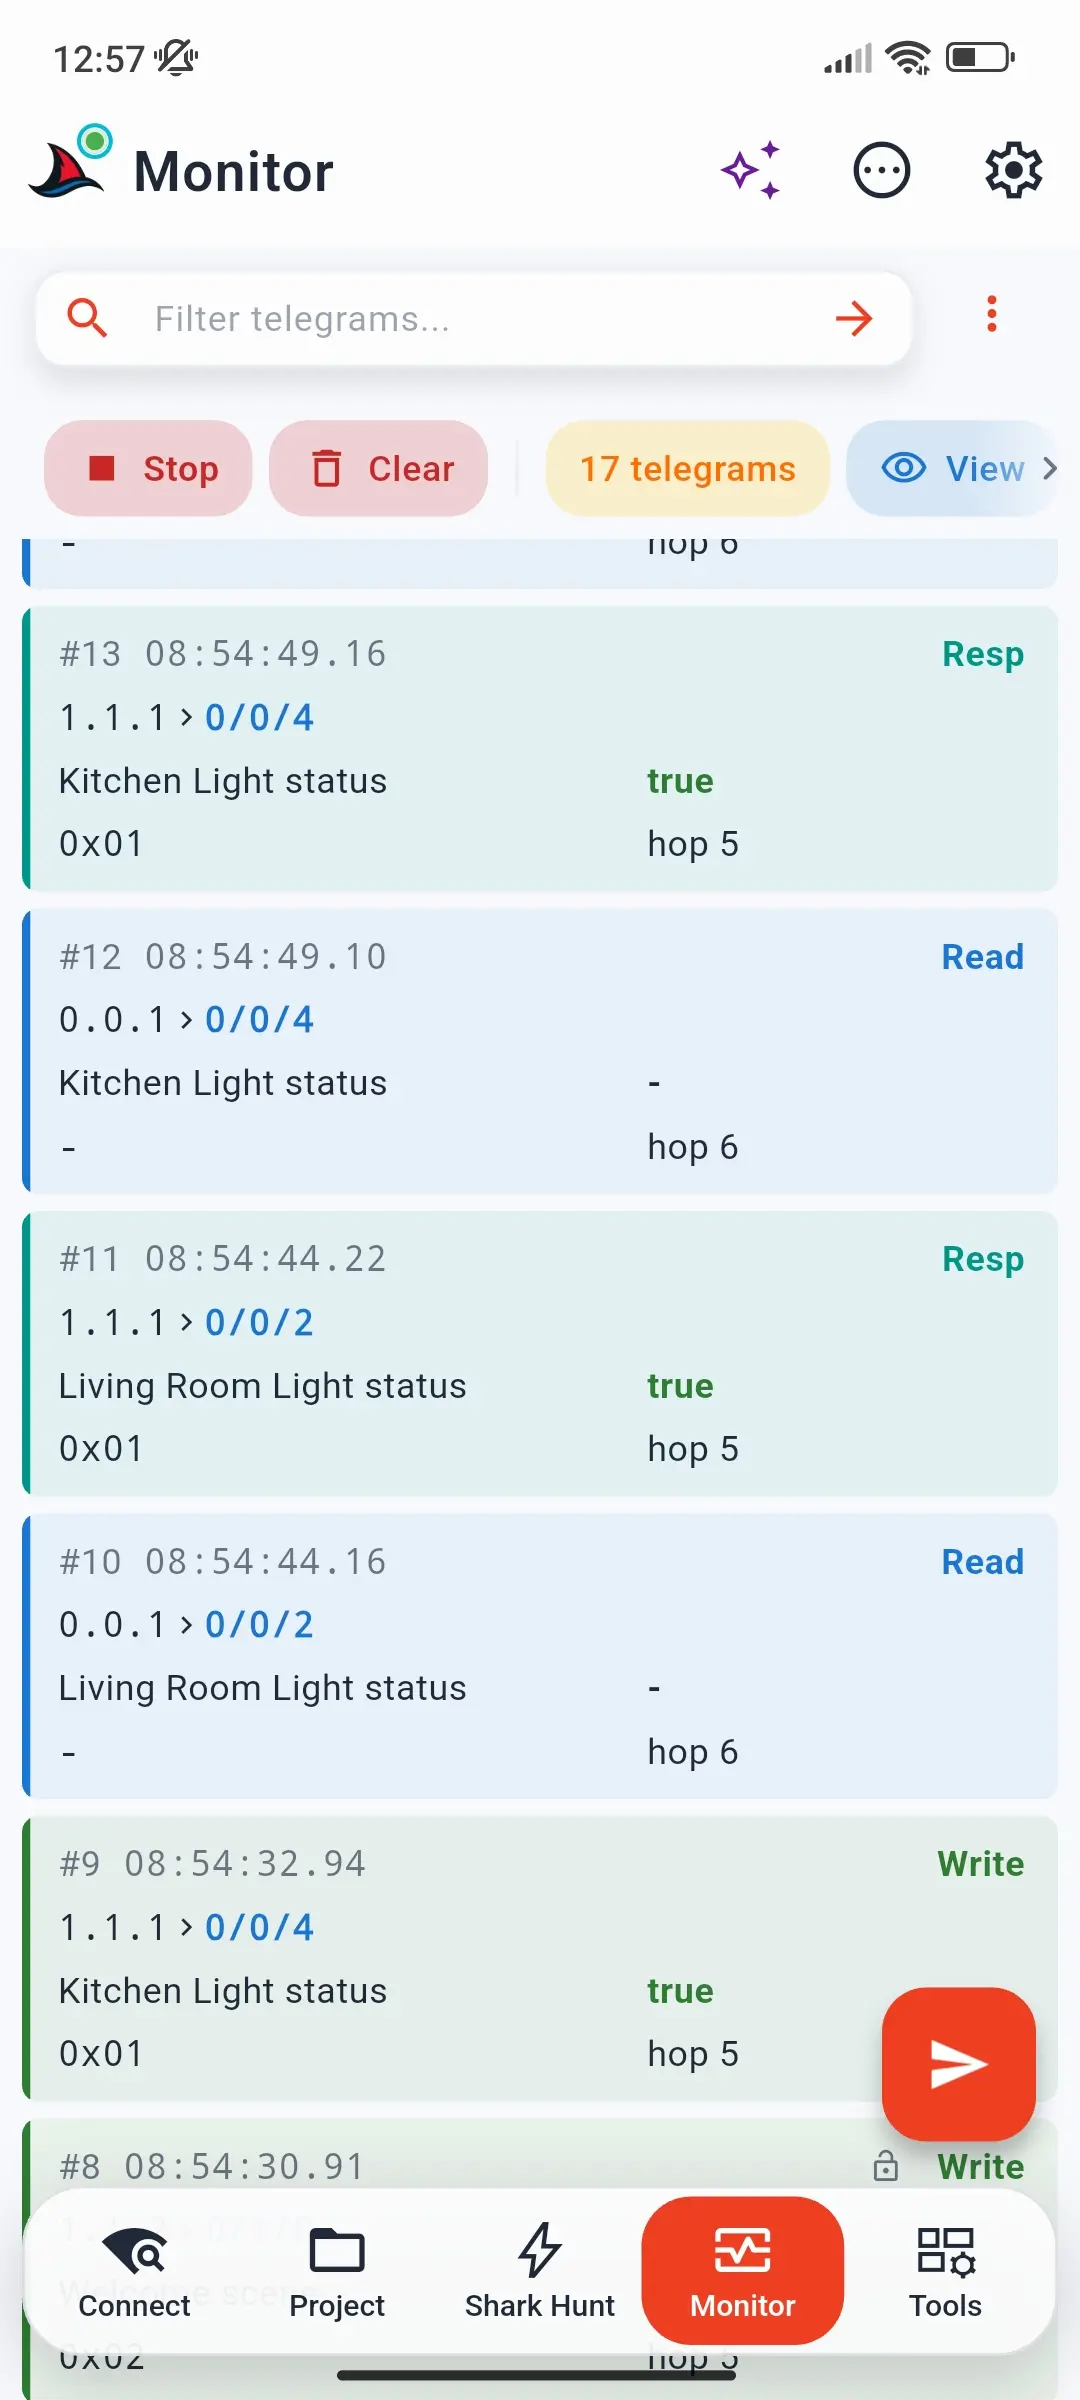
Tap any telegram to open its details: source, destination, decoded value, and buttons to send a Read or Write to that address.
Keep the screen on: On mobile, the monitor stops when the screen locks or the app goes to the background. Keep Screen On is enabled by default in Monitor Settings to prevent this.
Step 4 - Send a Command
While the monitor is running, the start button turns into a red send button.
- Tap send to open the Quick Send sheet.
- Tap New Command to open the command composer:
- Enter a group address, or tap the search icon to pick one from your project.
- Choose Write or Read.
- Select the datapoint type.
- For a write, enter the value.
- Tap Send. The telegram goes out on the bus and appears in the monitor list.
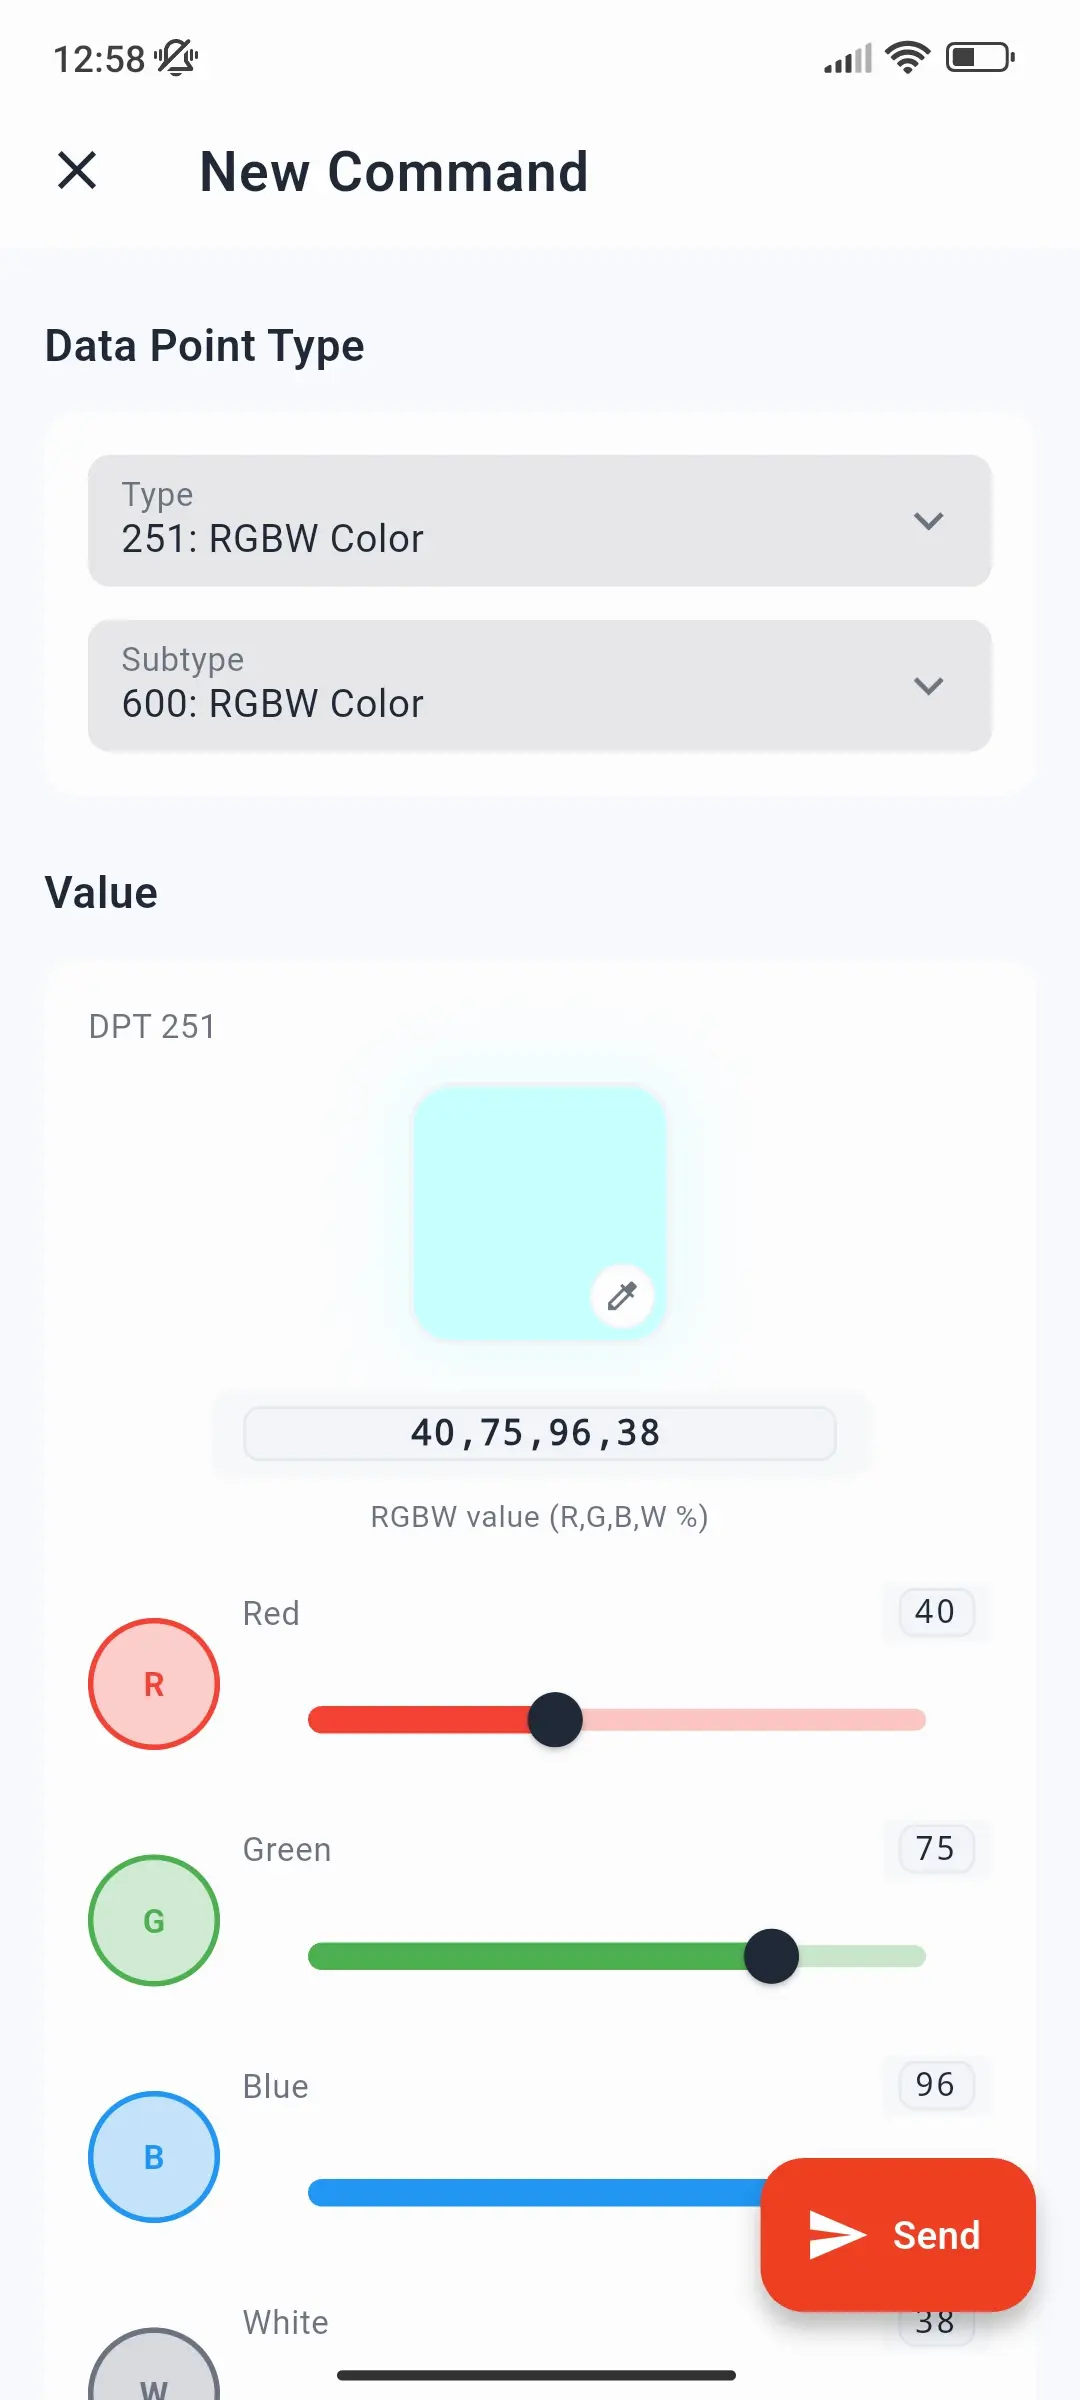
Resend in one tap: commands you send are listed under Recent in the Quick Send sheet. Tap one to send it again, or long-press it to edit it first.
Send button greyed out? A Bus Monitor session is receive-only. Stop the monitor and start it again in Group Monitor mode to send commands.
Or send straight from your project
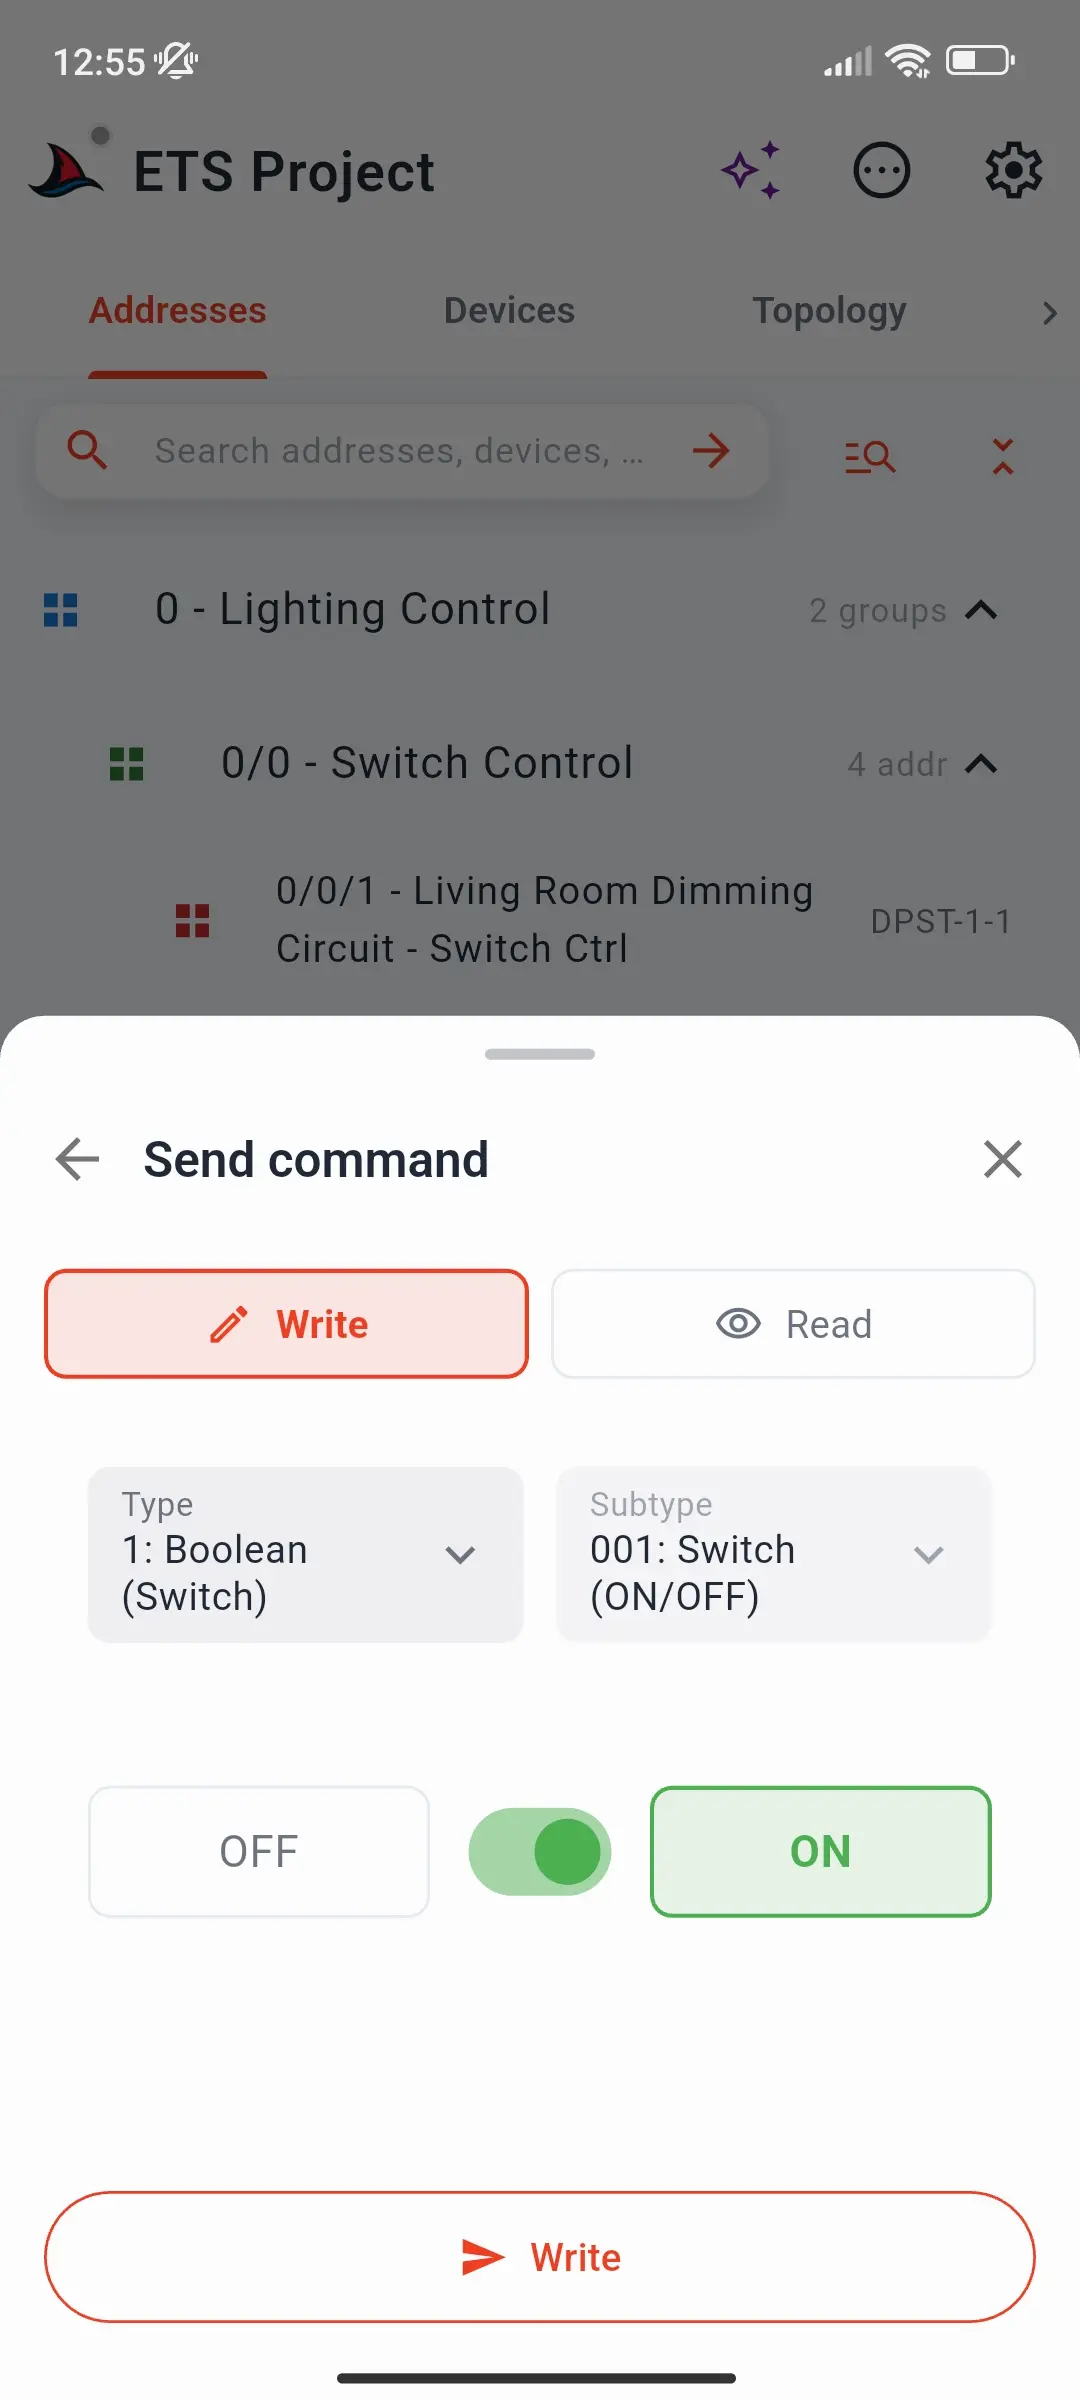
With a project loaded, you don't need the monitor open to send. On the Project page, tap any group address, then tap Send command in its details sheet:
- Choose Write or Read. The datapoint type is already filled in from your project.
- For a write, set the value.
- Tap Write (or Read) at the bottom. Responses to a read appear right in the sheet.
If you are not connected yet, the app asks you to choose a gateway first.
What's Next
You now have a gateway connected, your project loaded, and a live monitor session. From here:
| Goal | Guide |
|---|---|
| Browse group addresses and send commands from the project tree | Project Page |
| Build reusable test routines of commands and filters | Shark Hunts |
| Decrypt KNX Data Secure group telegrams | Set Up KNX Data Secure |
| Find which devices are present on a line | Scan Bus Line |
| Assign an individual address to a new device | Program a Device Address |
| Read device info or toggle programming mode | Inspect Device |
| Save a monitor session as ETS-compatible XML or CSV | Export Telegrams |
| Find answers to common questions | FAQ |