This guide sets up SharKNX to read KNX Data Secure telegrams in the monitor and to send secured commands that devices act on. Reading takes one step - loading your keys. Sending needs a sender address that the receiving devices trust.
For how KNX Data Secure works, see KNX Data Secure.
Before you start
- The installation's ETS project (
.knxproj) or its keyring (.knxkeys). Projects that use KNX Secure are password-protected, so you also need the password. - A connection to a KNX gateway - any kind works: a plain or secure tunnel, or routing. See Connect to a Gateway.
- For sending: access to the ETS project, to create a sender address the devices trust (Step 3).
Step 1 - Load the group keys
SharKNX installs the Data Secure group keys automatically when you load either:
- the ETS project on the Project page - see Load an ETS Project, or
- a keyring or project on the Security tab of the Connect page - see Set Up KNX IP Secure.
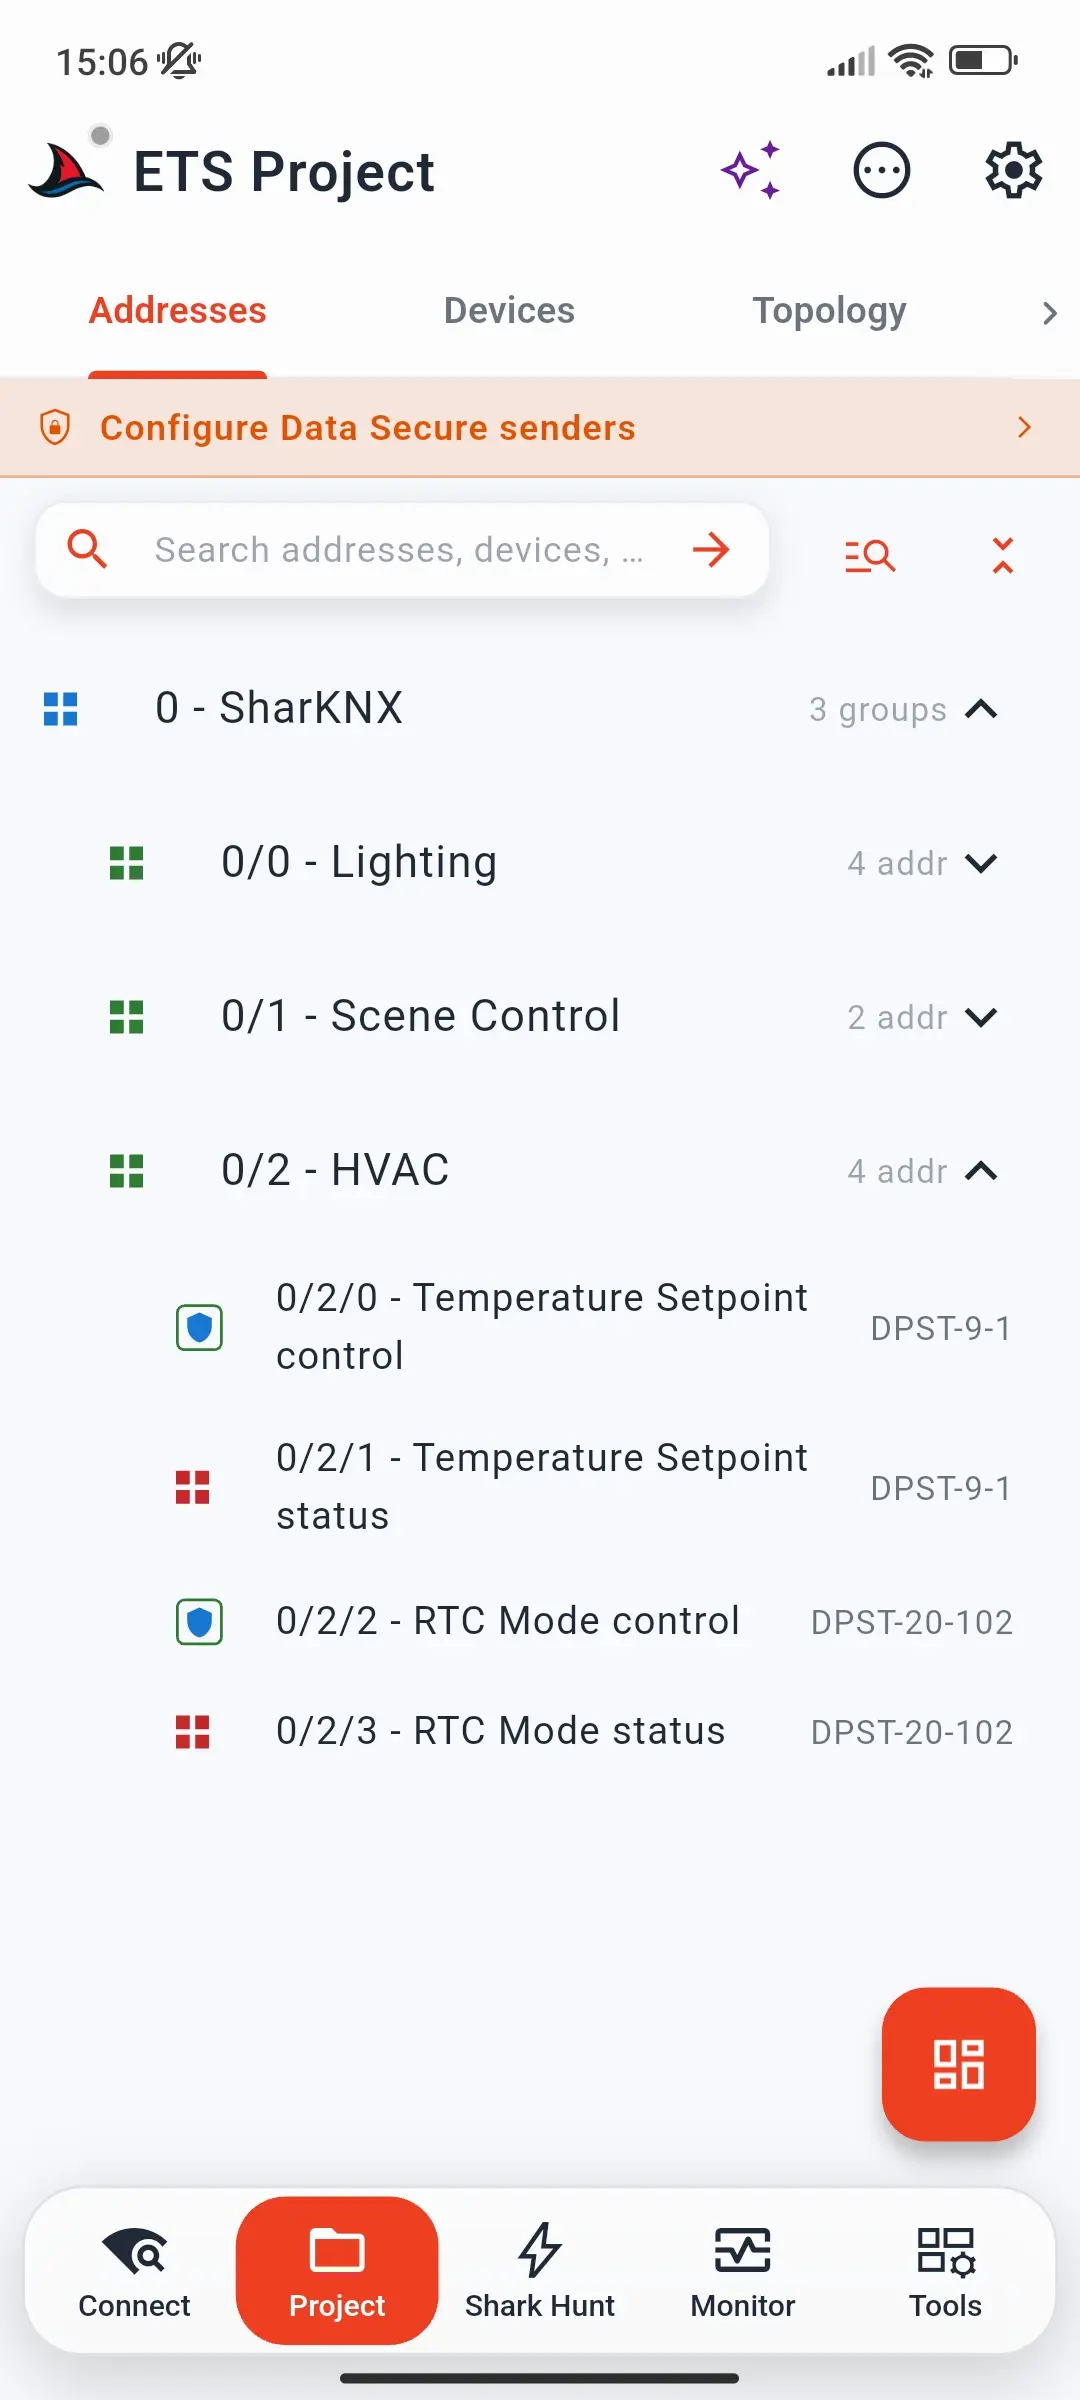
If the project contains secured group addresses, a Configure Data Secure senders banner appears below the tabs on the Project page.
Step 2 - Check that reading works
- Start the monitor on the Monitor page.
- Trigger a secured group address - press a push button or change a setpoint that uses one.
- The telegram appears with its name and decoded value, like any other telegram.
That's all monitoring needs. If you only want to watch secured traffic, you're done.
Step 3 - Choose a sender address
A Data Secure device only acts on commands from individual addresses listed in its security table - the senders ETS allowed for that group address. SharKNX has to send from one of those addresses.
Never use the address of a real, working device. A single command sent as a real device makes the rest of the installation ignore that device afterwards. The reason is in KNX Data Secure. This includes the addresses Auto generate fills in.
Create a dedicated sender address in ETS instead:
- Add a spare device to the ETS project - for example a secure IP interface used only as a placeholder - and give it a free individual address, such as
1.1.250. - Link the secured group addresses you want to send on to that device, so ETS adds its address to the receivers' security tables.
- Download the affected receiving devices.
- Export the project again and reload it in SharKNX, so the new device and address are in the project.
Connecting through a KNX IP Secure tunnel? The tunnel always sends with its own individual address and ignores the sender settings. Instead of a spare device, link the secured group addresses to that tunnel's interface in ETS and download the receivers - then skip to Step 5.
Step 4 - Set the sender in SharKNX
Open the KNX Secure Senders page by tapping the Configure Data Secure senders banner on the Project page, or the Data Secure badge on the Monitor page.
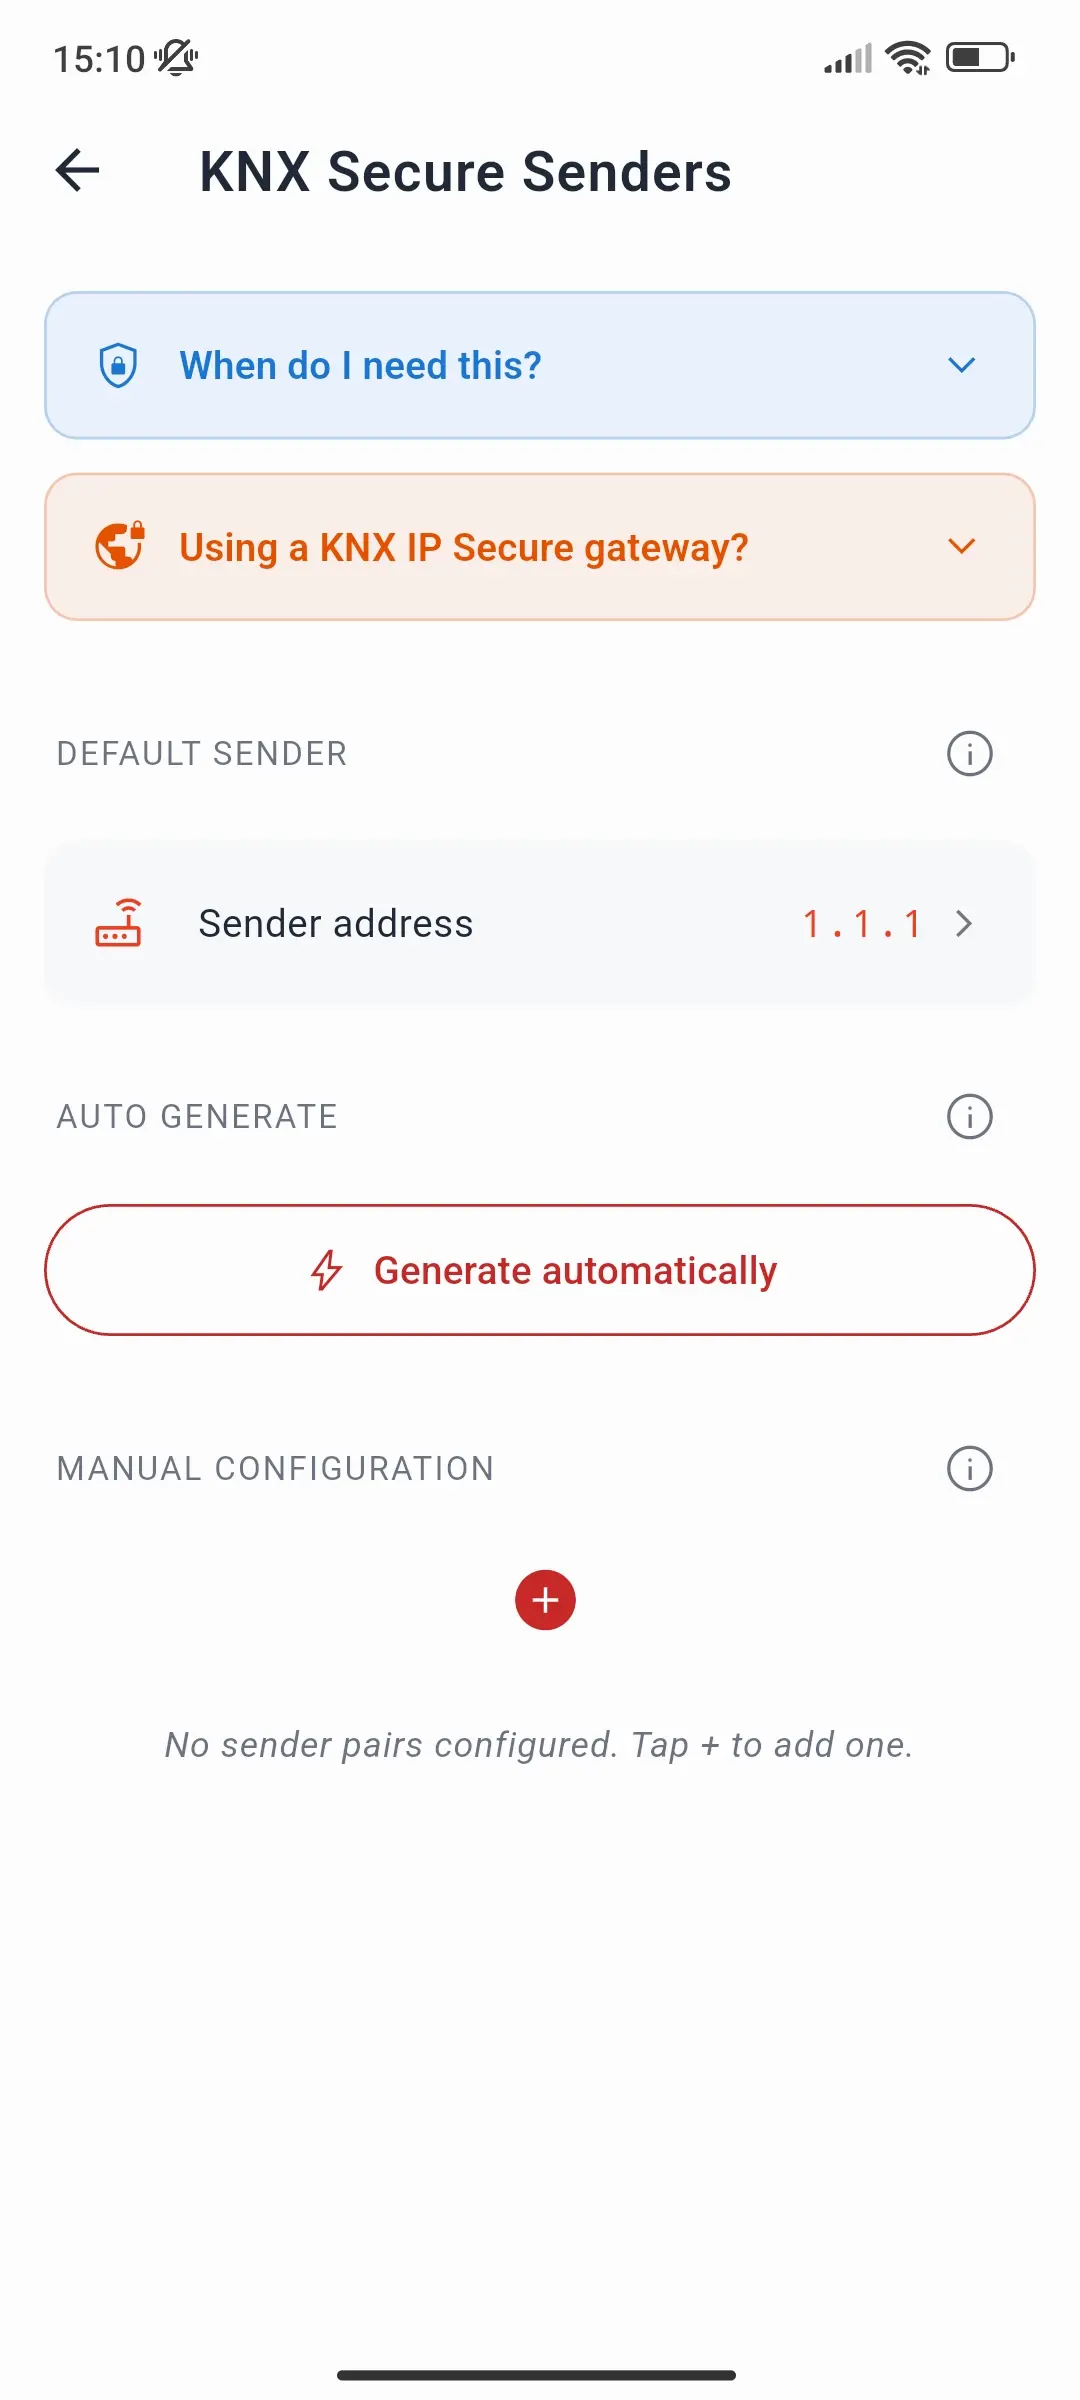
Simplest: one sender for everything. Under Default sender, tap Sender address and enter your dedicated address, e.g. 1.1.250. SharKNX then uses it for every secured group address. Auto means the address of your gateway connection - only useful if that address is trusted by the receivers.
Different senders per group address. Under Manual Configuration, tap + to add a sender pair:
- Sending Device - pick the device whose address to use, e.g. the spare device you added in ETS.
- Group Addresses - select the secured group addresses that should use it.
- Tap Save.
A sender pair overrides the default sender for its group addresses. Tap a pair later to change it.
Auto generate fills in a sender for every secured group address from the project - but it picks real devices' addresses, so read the warning in Step 3 before using it.
Once senders are set, the Data Secure badge on the Monitor page turns green.
Step 5 - Send and verify
- On the Project page, tap a secured group address, then tap Send command in its details sheet.
- Choose Write, set a value, and tap Write.
- The device should react, and the telegram appears in the monitor with its decoded value.
If you are on a KNX IP Secure tunnel with a sender configured, SharKNX reminds you that the gateway's own address was used instead.
Troubleshooting
| Problem | What to check |
|---|---|
| Secured telegrams show an encrypted payload | The keys are missing. Load the ETS project or keyring for this installation. |
| The command is sent, but the device does not react | The receivers don't trust the sender address. Check the address you send from and that ETS lists it as a sender for that group address - then download the receivers. |
| Devices stopped reacting to another device after testing | SharKNX sent as that device's address. See KNX Data Secure → Troubleshooting. |
| My spare device doesn't appear under Sending Device | Reload the ETS project after adding the device in ETS. |
| Keys changed in ETS | Load the updated project or keyring again - keys are read each time you load. |
Sender settings are kept across app restarts.