Before SharKNX can connect to a KNX IP Secure interface or join a secure routing backbone, it needs the matching credentials from ETS. This guide shows how to load them and connect.
For how KNX IP Secure works, see KNX IP Secure.
What you need
One of these, all created by ETS:
| Source | Use it for | How to get it |
|---|---|---|
Keyring file (.knxkeys) |
Secure tunneling and secure routing | In ETS, open the project's details from the project overview, go to its Security section, and export the keyring. You set a password during the export. |
ETS project (.knxproj) |
Secure tunneling and secure routing | Export the project from ETS. Secure projects are password-protected - you need the project password. |
| Backbone key | Secure routing only | The 32-digit hex key of the secure backbone, from ETS. |
A keyring or project also contains the KNX Data Secure keys and device tool keys, which SharKNX picks up at the same time.
Step 1 - Load the credentials
Open the Connect page and its Security tab.
Tap Load Credentials and choose:
- Keyring File - pick the
.knxkeysfile and enter the password you set when exporting it. - ETS Project - pick the
.knxprojfile and enter the project password. - Backbone Key - enter the 32 hex digits of the key.
- Keyring File - pick the
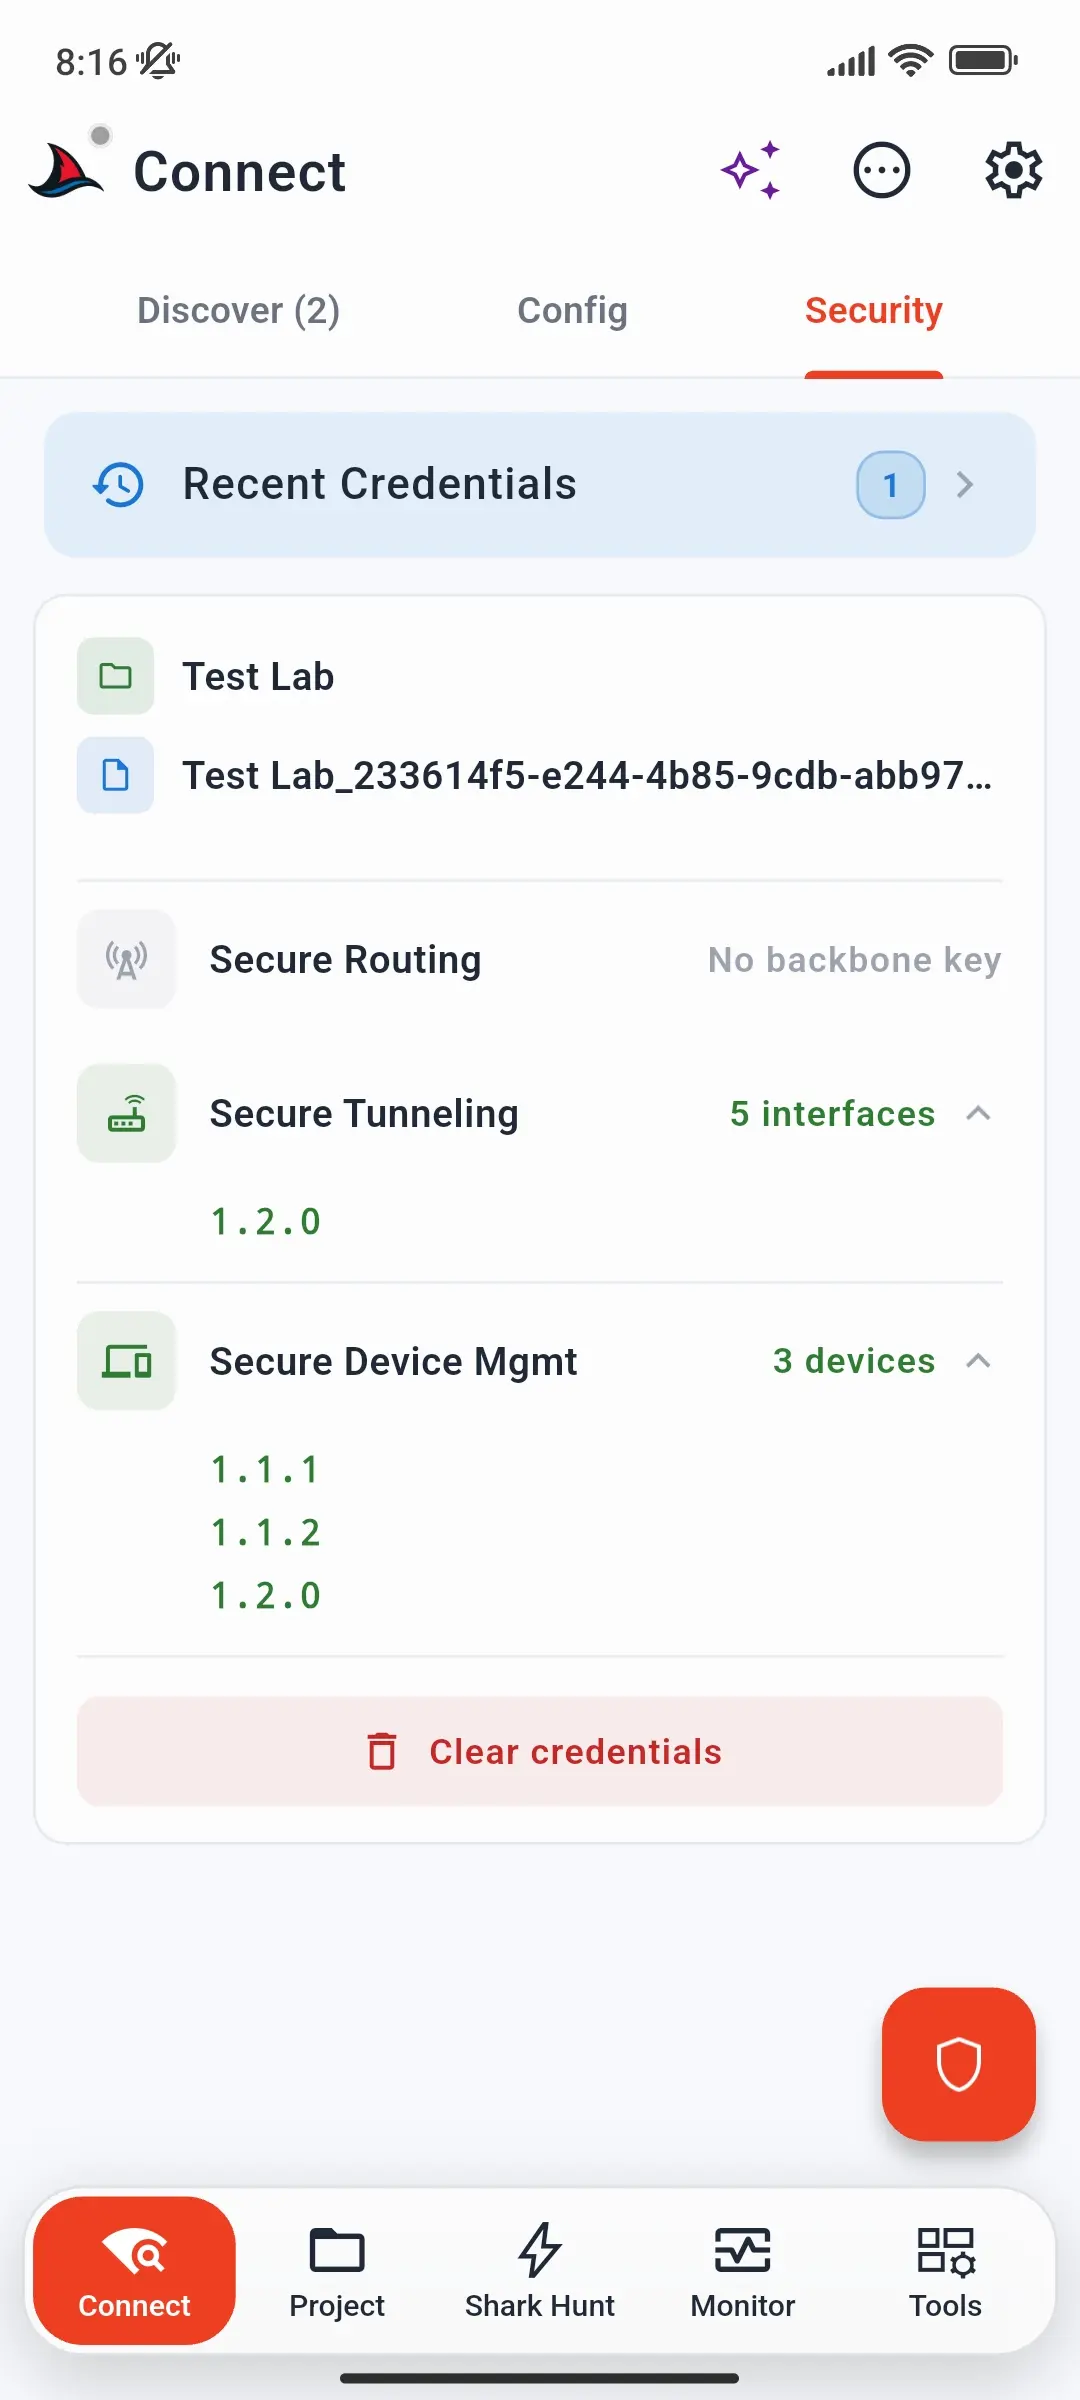
The Security tab now shows what was loaded:
Row Shows Secure Tunneling How many secure tunnel interfaces the file contains Secure Routing Ready when a backbone key is available, otherwise No backbone key Secure Device Mgmt How many KNX Data Secure devices SharKNX has tool keys for
A wrong keyring password is caught immediately - SharKNX checks the file's ETS signature and shows Incorrect password or corrupted keyring file.
Credentials are kept across app restarts. Loading a new keyring replaces the previous one; Clear credentials removes them. Files you loaded before are listed under Recent Credentials for quick reloading.
Shortcut: you can also load credentials from a secure gateway's detail sheet - see Step 2.
Step 2 - Check the gateway
- On the Discover tab, scan for gateways - or open the Config tab if you saved the gateway.
- A secure gateway shows the IP Secure chip. Tap it to open its details.
- The Credentials card shows the loaded file, how many Tunnel Interfaces it contains, and Gateway Match - whether the file has credentials for this gateway. Load Credentials or Change loads a different file right from here.
Gateway added by hand? SharKNX matches a gateway to its credentials by the gateway's individual address. Enter it in the KNX Address field when you add or edit the gateway - see Connect to a Gateway.
Step 3 - Connect
Secure tunneling: tap Select on the gateway. SharKNX opens an encrypted TCP tunnel with the credentials for that interface. If no matching credentials are loaded, it offers to take you to the Security tab first.
Secure routing: on the Discover tab, select the secure multicast option. It works once its status shows Ready.
Once connected, telegrams flow as usual - start the monitor to see them.
Troubleshooting
| Problem | What to check |
|---|---|
| Incorrect password or corrupted keyring file | Use the password you set when exporting the keyring from ETS - not the project password. |
| Gateway Match shows no match | The keyring or project belongs to a different installation, or the gateway's KNX Address is missing or wrong (manually added gateways). |
| Authentication fails when connecting | The interface was reprogrammed after the keyring was exported. Export a fresh keyring or project from ETS and load it again. |
| Connection works, but no free tunnel | All secure tunnels of the interface are in use by other clients - disconnect ETS or visualisations, or check the free-slots chip on the gateway card. |
| Secure routing shows No backbone key | Load a keyring or project that contains the backbone, or enter the backbone key manually. |
| Secured group telegrams still look encrypted | That is KNX Data Secure, a separate layer - see Set Up KNX Data Secure. |
Related
- KNX IP Secure - how secure tunneling and routing work
- Connect to a Gateway - all connection options
- Set Up KNX Data Secure - telegram-level encryption